Blog
Welcome to my blog! This is where I discuss various topics, tips and everything else in between in relation with food photography.
Sign up for my newsletter to get all of it sent straight to your inbox.
Search by Category

Sailrock Resort: The Crown Jewel of the Caribbean
Sail Rock Resort represents so much more than than an island getaway. I took so much joy in capturing the spirit of the Sail Rock through the people and places that make it special. So join me as I retell fun tales from my trip and share a brief photo gallery that will transport you to this Caribbean paradise.

I expected Turks and Caicos to be the adventure of a lifetime. I daydreamed about swimming in the crystal blue oceans and watching the clear skies peppered with stars when the Caribbean sun dipped below the horizon.
What I didn’t anticipate was that the journey there would be half the fun.
It took two flights and one rickety propeller plane to land me on South Caicos. The rush, the excitement, the tiny bit of sheer terror. It was like I was on a ride at a theme park, hanging on for dear life, with a huge grin plastered across my face.
When I finally disembarked from the flying death machine onto what could only be described as the smallest airport of all time, I was greeted on the tarmac with a cloud of disinfectant as a live band played a welcome song.
As I stood there, getting misted from my wrists to my fingertips in a bizarre fog, I couldn’t help but reflect on what led me to this point.
Earlier this year, plagued with pandemic cabin fever, I told my sister Reham that I was itching for an off-the-grid adventure. My trip to Costa Rica had just been canceled and I wasn’t ready to give up my dream of white sandy beaches. She told me all about her trip to Turks and Caicos, and bing bang boom. A few emails later, I had landed myself the adventure job of my dreams and the perfect excuse to vacation there - a 1 week gig as Sailrock Resort’s resident on-site photographer.

My husband Neil was more than welcome to volunteer as my assistant, so we packed our bags and jetted off to Turks and Caicos.
And now here I was, whisked away to the resort and delivered straight to their private, white sand beach. I spent my journey to Sailrock Resort in a dreamstate, but as I gazed out over the crystal blue horizon drinking in the tropical views, an employee placed one of these chilled, blue coconut beauties in my hand...
...and THAT’S the moment I knew I had arrived.
Although I had been hired to take photos for Sailrock Resort’s new menu, they were eager to give me creative control. They wanted me to take an intuitive approach and stray from the format of a simple product shoot.
It didn’t take me long to realize that Sailrock Resort, the food, the people, the culture, and the island are all intrinsically connected. You can’t really tell one story without telling the others. And that’s when it all fell into place.
Sailrock Resort does not exist in a bubble, so I knew I needed to capture it in its element, interacting with the world around it.


As I spent my one glorious week at Sailrock Resort, I came to understand that the resort represents so much more than an Island getaway.

It’s a Wellness Oasis for everyone, from celebrities to bloggers. Offering spa services, private lodging, and a locally-sourced menu. I’m convinced that it’s impossible to stay at Sailrock Resort without engaging in self-care. It’s designed to offer you what you need, mind, body, and soul.

It’s a Home Away From Home to its many international employees, who are bonded for life over the hardships of COVID-19. Neil and I became fast friends with the staff. They would laugh when I bossed Neil around, we’d ask them about their families in faraway places. The employees at Sailrock are the salt of the earth and the heart and soul of the resort.

It’s an Adventure Hub with paddle boarding, kayaks, sail boats, and snorkeling right off the beach. The resort provides bikes for easy navigation around the resort and island, tropical hiking trails, and weekly community bonfires on the beach.

It’s a Nature Reserve and a Refuge. I’ll say it plainly: Everyone at Sailrock gives a shit about the planet, and it’s not just performative. The resort sits on a natural reserve, and takes great care to adhere to the strictest standards of preservation. They practice sustainable fishing and don’t allow motorized boats near their coral reefs. I found it so refreshing to learn how much they care for their little island.

It’s a Land Bridge between the Atlantic and the Caribbean - I was shocked to discover that you can explore the island on foot and dip your toes in both bodies of water in a single afternoon.
Sailrock Resort is truly a choose-your-own-adventure paradise.

One of my favorite moments from my week at Sailrock is captured here.
One thing you should know about me is that I could eat lobster every single day of the year, so imagine how thrilled I was to find out I was visiting Sailrock Resort at the beginning of lobster season! After ordering every lobster dish on their menu, I learned the secret to what made their lobster so ridiculously delicious.
Chef Frank selects lobster and other seafood fresh every morning from local fishermen; so every single day, the seafood is fresh from the ocean.
When he told me this, I knew I had to see it for myself.
The morning this image was taken, I woke up at the crack of dawn to meet Chef Frank at the local docks. The brisk morning air, the short exchange of words, the smell of salt and seafood, the simple delight in picking out a handful of perfect sea creatures. It was pure magic.

From their tantalizing, locally sourced caribbean menu to the smiling faces of the fishermen that delivered the catch of the day, the grocery stores filled with local produce, and the awe-inspiring nature that surrounds it all, I took so much joy in capturing the spirit of the Sail Rock through the people and places that make it special.
To all the staff at Sailrock Resort, thank you for making my time in South Caicos truly unforgettable!
If I could do it all again, there are only 3 things I would do differently:
I would lean into “Island Time” - And not stress about timelines and shot lists. It took me a few days to get there, but when you click into the rhythm of the island, everything just flows.
I would teach Neil how to take BTS photos and videos - Bless him, the man did not understand the assignment.
I would stay longer - Take it from this city girl, it’s such a tease to travel to literal PARADISE and come home just one week later. If you’re lucky enough to spend time at Sailrock Resort on South Caicos, postpone your return flight... then push it out again.
Coming away from my magical week, I have a renewed appreciation for untouched nature, a reminder of why I love to travel, a full belly, and a bunch of wonderful photos I can’t wait to finish editing.
I’m already dreaming of a future where I’ll have more opportunities like this to combine my passion for travel and photography.
If you want to know what it’s like to work with me on projects like this, let’s talk! I am eager to add another stamp to my passport.

7 Tips for More Eco-Friendly Food Photography
Food photography is in an industry that is notoriously wasteful, but I’ve learned that there are a few easy ways to be more sustainable.. Many of these practical, judgment-free tips are universal and applicable to anyone who wants to be more eco-friendly.

On a scale from filling a single mason jar of yearly waste - to - requesting plastic bags at the supermarket, I fall somewhere in the middle.
I care about the earth. I love being out in nature, I am a proud plant mama and get so much joy from my little patio garden in my city home. So even though I’m not perfect, I do make an effort to do my part.
Over the years, I’ve adopted more eco-friendly habits; in my personal life and in my food photography, and I truly believe every little bit counts. From food waste to single-use props, I’m in an industry that is notoriously wasteful. And while there’s some amount of waste that is unavoidable as a food photographer, I’ve learned that there are a few easy ways to take steps toward better sustainability; and that’s what this blog is all about.
I’m still learning and growing in my eco-friendly efforts; so I hope you’ll join me in my journey and share any additional tips you might have with me!
Don’t Worry About Perfection
This first point isn’t so much a tip as it is an affirmation. It’s easy to think of sustainability as this huge, overwhelming thing. But what the world really needs is not a few people doing it perfectly, but a lot of people making small but meaningful changes toward sustainability.
Start with ONE Thing. Sustainability is a journey.
When I start to feel guilty or overwhelmed I remind myself that it’s better to do one thing than nothing at all.
Compost Your Food
I would love to tell you that every food dish eventually goes on to be enjoyed as a delicious meal, but that’s simply not true. In a controlled environment, like when I’m shooting at home, I can take measures to protect food from contamination as I photograph it. But when I’m on set, the food often sits out for hours and/or gets touched by everyone. And that’s where I have to draw the line and throw it out.
It’s such a shame to see good food go to waste, but I don’t mess around with food safety.
Whether you’re a food photographer or not, composting is something we should all be doing. When you throw food scraps away in the garbage, they end up in a landfill and release methane gas. METHANE GAS! I’m no scientist, but even I know that is bad.
On the flip side, composting turns your food scraps into (what is referred to in the gardening community as) ‘black gold’; ie. highly nutrient-rich organic matter that can be used to nourish the soil.
If you don’t already have a composting system, there are lots of options:
For Hands-Off Composting: Many cities offer compost pick-up for a nominal fee. Just type “[your city] composting” to search your options.
For Hands-On Composting: There are so many at-home systems you can purchase - with many options to fit any budget.
For DIY Composting: There are step-by-step instructions available to help you build your own compost pile.
Grow Your Own Veggies
Before you roll your eyes around your small city apartment and scroll past this section, hear me out.
I live in L.A. in what we call a “tall and skinny”. As in one of those tall and skinny houses with 2 inches of lawn space and an intrusive view into my neighbor’s bedroom. Like, we could share an air freshener.
Believe me when I say I understand the struggle. And that’s why I LOVE my Lettuce Grow Farmstand. It’s a bit of an investment, but this thing is magic. It’s a self-watering, self-fertilizing garden that’s built vertically so it takes up almost no space on my patio. And it’s always lush with fresh veggies and herbs.

If you have limited gardening space like me, I encourage you to make a list of the fruit, veggies, and herbs that you use the most. Then, either purchase a farmstand or go out and buy a few pots and starters and build your own potted patio garden.
Not only will it give you a supply of fresh produce, but it will also help you connect with food in a new way, and add some gorgeous greenery to your space.
Here are a few other suggestions:
Start A Garden - If you have land, carve out some space to grow your own garden.
Join a Community Garden - Plant produce in your own section of a community garden.
Community Supported Agriculture (CSA) - Sign up to get regular produce delivery from a local farm. You’ll support local farmers, have a constant variety of veggies to shoot, and keep your content fresh.
Reduce, Reuse, Recycle
On any food photography set, it’s easy to go through an entire roll of paper towels. What can I say, I’m a messy gal! One swap I’ve made in recent years is to bring my own reusable microfiber cloths and Tupperware to photoshoots. I also bring my reusable grocery bags to the grocery store.
These small shifts can make a huge difference over time; especially when you’re working with a lot of food regularly.
Keep It Food Safe
I have a strict rule on set that I only use food-safe ingredients. This might sound like an obvious “given”, but in food photography, we have all sorts of tricks that help us bring our food to life in front of the camera - a spritz of this, a drizzle of that - and not all of them are edible.
When I was first learning food photography, I was taught to use shaving cream in place of whipped cream. It looks identical, it’s easy to get a perfect swirl, it doesn’t melt... I get the appeal. But as soon as you put that perfect swirl of shaving cream on that banana sundae, you contaminate it. That means it can no longer be eaten OR composted.
As for me, I’ll swirl real whipped cream over shaving cream. I’ll keep glue out of my cheerios, cover my pancakes in syrup, NOT motor oil, and spray my meat dishes with food-safe glycerine instead of browning liquid.
Gift Extra Food
Whenever I’m on set, I buy extra ingredients for my photoshoot. I do this for many reasons:
It gives me a few of everything to choose from if my produce looks beautiful on the outside and not so appetizing on the inside.
It allows me more food styling and posing options - I can highlight ingredients alongside the final dish.
It prevents me from having to run to the store if something gets cut wrong, wilts, or cooks too long, etc.
More often than not, I end up with extra food at the end of my shoot. When this happens, I have a list of people I call to pick up my leftovers. It’s a fun way to give food to friends and family and cut down on food waste. Oh, and packaged food can be returned or dropped off at any local food bank!
Thrift Or Borrow Props
I love treasure hunting in antique shops for amazing props and unlikely surfaces. Not only does it help me give old things a new life, the pieces are often very affordable, and they help me build a unique collection.
In addition to thrifting, I frequently borrow pieces from friends and family. If a photoshoot calls for it, I swipe their dishes, vases, tablecloths, you name it!
I’m shameless about my thrifting and borrowing because single-use props are so wasteful. On the occasion that I do have to buy a new prop, I try to buy from sustainable companies with eco-friendly practices. Of course, I do make the occasional run to Target, but because I look to friends and family, second-hand, and sustainable stores first, I save a lot of retail waste.
As a food photographer, I know that this industry has a long way to go; and It’s important to me to be part of the solution, not part of the problem. I’m far from perfect, but I believe that by taking small steps forward together, we can make a big change!
If you’re a food photographer or simply an earth-loving human like myself, what tips do you have for living and working more sustainably?

Recipe Development: Cooking Up Photographic & Culinary Magic
What is recipe development and how can it your product the attention it deserves? I’m peeling back the curtain to show you my recipe dev process - from ideation to final concept. And I’m sharing some of my favorite food photography and recipe projects along the way. This blog is for photographers who are curious about dipping your toe into recipe development and for food product creators who are ready to offer fresh recipe content to your customers.

Everyone has a love language; mine is creating food.
As a food photographer, I spend so much time behind the lens, but my first love is (and always has been) making beautiful food in the kitchen. In fact, it’s how I got into food photography in the first place!
I’ve learned that, while I absolutely love photographing other people’s creations, some of my favorite jobs are the ones that allow me to come up with my own creations; namely, through recipe development.
What Is Recipe Development?
Recipe developer is a vague term that can be used for anyone that creates recipes. As a food photographer, my recipe development work comes from companies who make food products that are meant to be used in recipes.
My job as a recipe developer is to bring a product to life by showcasing it in a recipe that is creative, on-brand, tasty, and photogenic. I create recipes that show off the possibilities of the product and make the reader think, “I have to try that!”
And that’s why hiring a seasoned recipe developer is absolutely crucial.
It won’t surprise you to hear that most recipe developers are professional food photographers and videographers. This is because food photography is a vital part of recipe development.
Your recipe is only as good as your visuals. Your photos are what will determine if your readers rush to buy your product, or scroll past it faster than you can say don’t judge a book by it’s cover!!
It doesn’t matter how delicious your recipe tastes, if it looks like you made it, dropped it on the floor, then took a photo of it with your iPhone 4, it never stood a chance.
Food photographers know how to capture a reader’s attention with images that jump off the page and tease the senses. Using surfaces, lighting, props, and fresh ingredients, we expertly set the stage and style the dish to make the recipe look oh-so-irresistible.
Recipe development is an art form and one that I’ve cultivated over the years. I’ve learned a lot, including that:
I prefer to make savory recipes over sweet recipes.
I believe that techniques are the key to developing a successful food recipe and this is one of my greatest strengths.
I thrive in the challenge of creating food that tastes incredible and knows how to work a camera.
Over the years, I’ve worked mostly with food companies and food manufacturers that need recipes to showcase their product; I love doing projects like these. My big dream is to work on a cookbook for myself or a client someday - If you have the same dream, let’s make it happen!
Why I Love Recipe Development

Growing up in Syria, my mother didn’t use recipes. The dishes she made were taught to her by her mother and grandmother. Now, living in L.A. I’ve become diligent about writing our recipes down for my kids as a way of passing on my family traditions.
I think this may be why I have always been passionate about food and recipes, ingredients, and techniques. I geek out over simple things like making a perfect bowl of steamed rice and finding the most delicious spice blend.
Working in the kitchen keeps me grounded, humble, and hungry for innovation and inspiration. It allows me to go back to my roots and play with veggies, proteins, spices, and herbs. It’s a chance for me to flex my creativity, get my hands dirty in the kitchen and really get to know my client’s product while I bring it to life in a tasty, tangible way.
And because recipe development isn’t the bulk of my work as a food photographer, these projects add variety into my day and reignite my creative passion for food and food photography.
Client Feature: Pacific Spice

I couldn’t write a blog about recipe development without talking about Pacific Spice Company (PSC). They’re a company I’ve worked with for years, and some of the work I’ve done for them is featured throughout this blog.
PSC is a California-based B2B spice company. They sell spices and herbs which are not only a dream to work with, they’re also uniquely beautiful to photograph. I love to create recipes that incorporate multiple herbs and spices that can be seen visually in pictures, and they’ve allowed me to do that time and time again.
I work closely with PSC on recipe development and have been creating recipes for their blog page and social media for years.

Here are a few of my favorite recipes I’ve created for Pacific Spice Company over the years:
My Recipe Development Process
My recipe development process varies with the client. Oftentimes, I’m hired for something specific; and other times, I’m given very little direction and more creative control over the final product. Either way, it’s collaborative.
Step 1.
My recipe development process begins by scheduling a strategy session with my client. I take a deep dive into their company and spend time really getting to know them. The goal of this meeting is to talk about their brand and what aspect of their product they’d like to highlight for their particular audience.
step 2.
Next, I shift my focus to the product. I talk about it, look at it, smell it, put my fingers in it (ok, not really), and sample it to really get to know what I’m working with. If inspiration strikes, I make sure to jot it down.
STEP 3.
I put pen to paper to brainstorm a list of potential dishes. I do a little research and narrow the dishes down to a few of the best options. Then, I send the client a recipe ideation presentation explaining each dish and why it would be a good option for their product.
STEP 4.
We review the presentation and select the final recipe. We choose the one that’s the most exciting, on brand, and photogenic. It’s important to note that I always develop recipes with the photographer and videographer in mind; building beautiful, photogenic recipes around a single ingredient. The final vision for the product is a key component to our ultimate decision.
STEP 5.
Finally, It’s time to break into my closet of props and surfaces and plan the photoshoot! But before I even step foot on the set, I outline my deliverables.
How many images am I delivering? A typical package includes 3 final recipe shots for the web and print. Clients will have a full gallery from that day’s photoshoot to choose from. From ingredient shots, to action shots, to final shots.
How will these images be used? Will they be used as poster prints, on packaging, on social media, or on your website? I’ll work with you to make sure I’m capturing exactly what you need.
Will there be video? Video can easily be added to any package, and I highly recommend doing so. Not only do videos bring life to your brand, they are a fantastic addition to your social media. If you follow social media trends, you know that video of any kind is the best performing content across all platforms. Check out this video I created for PSC’s pickling spice blend.
With a recipe and clear deliverables outlined, it’s time to create my vision for the shoot and make culinary and photo magic in the kitchen!

Recipe development stretches my imagination, pushes me in the kitchen, and always makes me reconnect with my passion for food.
A lot goes into recipe development but it’s something I’m so passionate about.
I absolutely love working with all kinds of companies and creating versatile content for them to use on their blog, website, and social media pages. For me, recipe development is fun, rewarding work that lights a fire under me.
If you’re ready to offer eye-catching, drool-worthy recipe content to your customers, contact me for a quote! I’d love to work with you.

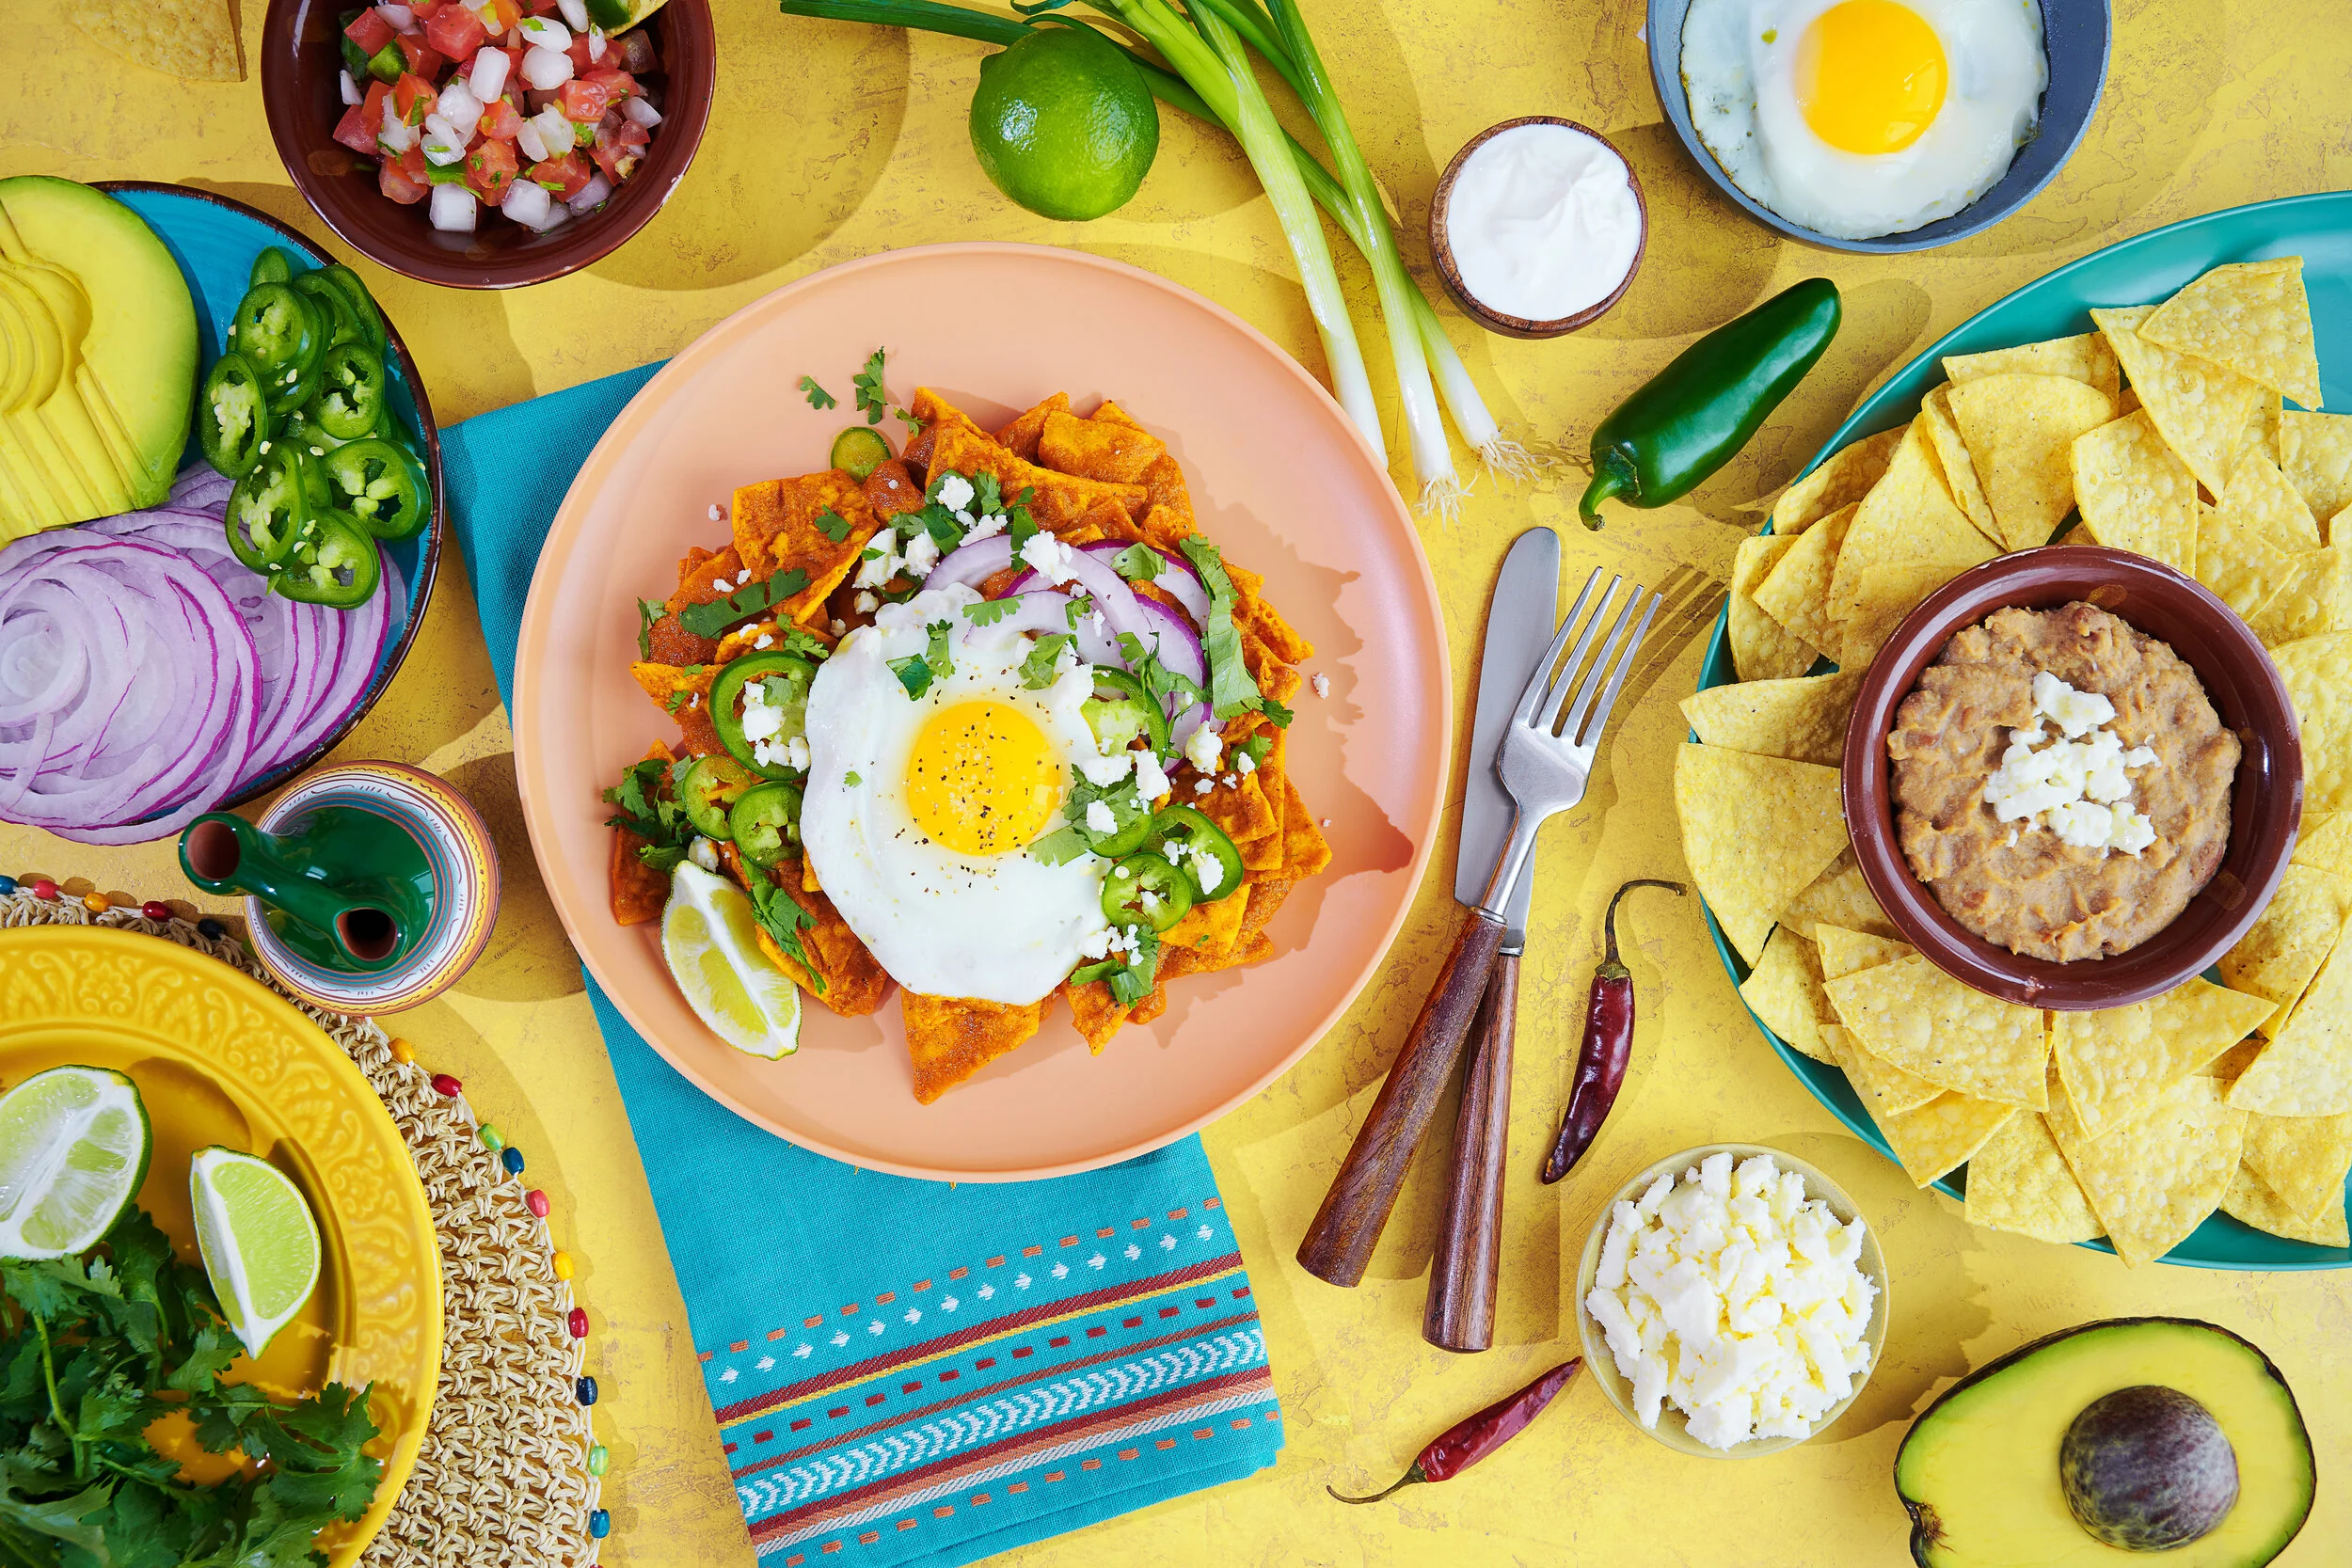
Chilaquiles: Everyone's Favorite Comfort Food
Even if you didn’t grow up eating them, chilaquiles feel like a familiar comfort food. They’re a savory masterpiece of layered ingredients, and a hearty breakfast that deserves to be enjoyed any time of the day. Today, I’m sharing my famous chilaquiles recipe with homemade red sauce. Learn more about chilaquiles, and follow along!

While Mediterranean food is my birthright, Mexican food is my privilege.
Living in L.A, I have done my fair share of self-guided food tours through some of the best south-of-the-border restaurants. And let me tell you: If you serve me up a mean plate of chilaquiles, I’m your customer for life.
Last month, I detailed how I design a themed photoshoot, from start to finish. I dove into every detail… except for the star of the show: This scrumptious plate of CHILAQUILES! Not only did I get requests from readers, I couldn’t pass up the opportunity to share with you my famous homemade chilaquiles recipe.
What are Chilaquiles?
Chilaquiles are an authentic, centuries-old Aztec and Mexican meal that has been passed down through generations; and they’re still a staple meal today. In their most basic form, chilaquiles are fried tortilla strips that have been sautéed in red or green sauce and are topped with any combination of cheese, eggs, veggies, and meat.
I can tell you from experience that even if you don’t grow up eating them, chilaquiles feel like a familiar comfort food.
They give you a moment of warm, crunchy, gooey, spicy, salty deliciousness that you didn’t know you needed. They’re a savory masterpiece of layered ingredients, and a hearty breakfast that deserves to be enjoyed any time of the day.
And trust me on this: You won’t find a better hangover food. Between the salt and the spice, your tummy will be settled, full, and happy when you crawl back into bed to catch some extra Z’s.
How do You Make Chilaquiles?
The thing about chilaquiles is that, even in their most basic form, they’re good. But if you’re willing to put in a little time and care, you can take them from “good” - to - “I’ve found my soulmate and we’re running away together”.
So even though there are plenty of shortcuts you can take, I really believe putting time into little details - like making your own sauce - is WORTH it. (Because I love to work with the ingredients I already have in my kitchen, I went with a red sauce.)
You should be able to find all of these ingredients at your local grocery store or latino market. I wouldn’t be surprised if you have some of them in your kitchen already.
Let’s dive in!
Red Chilaquiles Recipe
Ingredients:
1 tbsp vegetable oil
1/2 onion, sliced
2 garlic cloves
6 roma tomatoes
3 california chilies, dried
2 arbol chilies
2 bay leaves
1 tsp cumin ground
1 tsp oregano
1 tsp chicken base paste
1 cup water
Salt and pepper to taste
4 eggs
1 bag restaurant-style tortilla chips, packaged
4 oz queso fresco, crumbled
Toppings (optional) : Pico de gallo, avocado, red onion, cilantro, onion, jalapeños, sour cream, hot sauce
Method:
Prep dried chilis by removing seeds and ends.
Heat oil in a large skillet. Add onion, garlic, and tomatoes until it starts to brown (about 2 minutes) then add chilis, bay leaves, cumin ground, and oregano. Stir often for about 4 minutes to bring out the flavors of the spices.
Add chicken base paste and water and bring to a boil. Turn down heat and cover. Simmer for 8 minutes.
Add everything to a blender and blend till smooth. Add salt and pepper to taste. Return sauce to the pan.
Heat oil in another skillet and fry your eggs. Toss your chips in the sauce while the eggs are cooking.
Plate your sauced chips. Place fried egg on top and add your favorite toppings.

Suggestions:
Prepare ahead of time! You can make the sauce first and save it in a jar in the refrigerator to cut down your prep time.
Add a protein! Try this recipe with shredded chicken, shredded beef, or even tofu.

Ok, now take a bite! What do you think?!
The best part about chilaquiles is you have all the freedom in the world to make them your own. They’re a breeze to make and a great way to dress up your basic egg breakfast to collect happy ooo-la-laaa’s from all your friends and family.
So experiment! Get weird with cheeses, last night’s barbecue, and a whole mess of toppings.
Oh, and if you love this recipe, check out how I styled and shot this very chilaquiles recipe in this dreamy southwestern themed photoshoot.
Crafting Your Style & Story For a Food Photoshoot
I’m bringing you along with me today as I navigate styling and shooting a southwestern themed food photoshoot. Through each phase of the process, I’ll share with you why I made the creative choices I did in choosing my colors, props, lighting. These tips are universal, so there’s something in this for new and seasoned food photographers alike.

When I was just starting out, I built my portfolio by shooting my own themed photoshoots, using whatever materials I could. And with every cheesecloth camouflaged as a napkin, placemat pretending to be a surface, and natural light-only set, I built my career from the ground up. I didn’t let lack of clients, props, or gear hold me back, I embraced my limitations and got creative with what I had.
Today, I have so much more to work with but I still like to keep it simple.
The food is your story, you don’t need a bunch of fancy props, lights, or gear to do a drool-worthy food shoot.
Today I’m writing the blog I wish I could have read when I was just starting out. I’m detailing how I styled and shot this southwestern chilaquiles photoshoot. Through each phase of the process, I’m sharing with you why I made the creative choices I did in choosing my colors, props, lighting, etc.
By following my process as I navigate styling and shooting this themed photoshoot, my hope is that you’ll leave with a new perspective that you can take with you.
Whether you decide to design your own southwestern photoshoot or you execute a photoshoot with a completely different theme for a client, these tips are universal.
So follow along; get your feet wet, learn something, and collect some tasty photos for your portfolio; because there’s no better way to learn than by doing.
Prepare for Your Photoshoot
Start with a Story
When I plan a photoshoot, I take some time to really think about my client; real or imagined. Why? Because in commercial photography, you need to be able to tell your client’s story; from their brand aesthetics to their backstory. And when you’re really clear on the story you want to tell, it comes through in the photos. They always end up feeling more cohesive, dynamic, and unique.
Everyone has their own process, but I always start with emotion. I ask myself, “Beyond super hungry, what do I want my viewer to ultimately feel when they look at the photos?” In this photoshoot, I wanted the viewer to feel like they were on vacation, so I focused on colors and lighting in particular to bring that fantasy to life.
Create a Shot List
I’ll be honest, I don’t always prepare a shot list when I do my own photoshoot, but when I’m going to be on set, It’s an absolute must. I can’t even tell you how much preparing a shot list ahead of time has helped my workflow. It keeps me organized and makes it so I can easily transition from one shot to the next. Most importantly, it saves me from ever missing a shot!
To learn more about my food photoshoot prep, and to get your own free copy of my food photography shot list template, check out my previous blog, Preparing for a Food Photoshoot (+ Free Shot List Template).
Colors

Whenever I talk about colors, I have to talk about creating a color palette. I do this in the planning stage and always leave a little room for some experimentation along the way (you never know what colors will speak to you).
When I prepare my color palette, I consider two things: The theme of the photoshoot and the naturally occurring colors in the food I’m shooting.
Theme: Southwestern
When I think about the southwest, I think about the desert with all of its earthy, bold, and contrasting colors and materials; from the color of the clay, to the cacti, the found stones, and the sunshine. Here you can see it all together, with clay brown, green, turquoise, and a pop of yellow.
I also considered other organic materials such as silver, wood, and straw and brought them in by selecting this rustic silverware and these round, woven placemats
Food: Chilaquiles
As you can see from the images, my chilaquiles are made with a red sauce, green herbs, and yellow yolks and tortillas; the same main colors as the desert palette!
Coming up with this palette was easy because the subject and theme had similar colors. When you set up your own photoshoot, feel free to use my palette, or search “[theme] color palette” on Pinterest for some quick inspo for anything from “70s retro” to “Moroccan”.
Movement

Ask yourself, “What type of culture does this food represent?”
From the beginning, I knew that if I was going to photograph a southwestern-inspired recipe, I had to bring some life into it! But because this was a recipe photoshoot, and not a lifestyle photoshoot, I had to resist my urge to call everyone in the neighborhood and feed them tequila. Instead, I showed playfulness in my human element shot where I had someone dig into the fried egg. It resulted in a fun, slightly messy pic.
Props
Everything can be used as a prop; from textiles, to tableware, to the ingredients themselves! When you collect props for your photoshoot, think about the following:
Tableware - Select tableware that is not only in your color palette, but is authentic to your theme, and gives an interesting texture to the photoshoot.
Textiles - Textiles are a great way to bring a pop of color and texture into the frame. If you don’t have many options at your disposal, use your imagination. Experiment with textiles such as blankets, curtains, and handkerchiefs.
Ingredients - Think about how you can cleverly use ingredients from the recipe. Things like whole spices and garnishes are perfect as props.
Here’s how I selected my props for this shoot:
Tableware
I always look around my house to see what I have on hand before I shop, then I try to select just one or two items with cultural significance like a vase, a dish, or a placemat
While many of the materials in this photoshoot were from Target for $10 or less or World Market, I’ll always encourage you to support small businesses (if you’re financially able to) and treasure hunting at thrift stores for budget-friendly (often super unique) materials. Oh and borrow from your friends! I’m always calling people to see if I can use this or that from their kitchen (I like to think they’re flattered by it :)
Textiles

When I first started researching Southwestern colors and patterns, I looked up the difference between Southwestern and Mexican. I found out that Mexican textiles often feature straight lines, while Southwestern aesthetics have more interactive patterns. That’s part of the reason I just fell in love with this linen the moment I saw it. It has a bit of an interactive design that is inherently southwestern without being too over-the-top and costume-y. I just love pairing this bright textile with the natural fibers of the round, woven placemat. Together, they bring so many interesting textures and shapes into the photo.
Ingredients
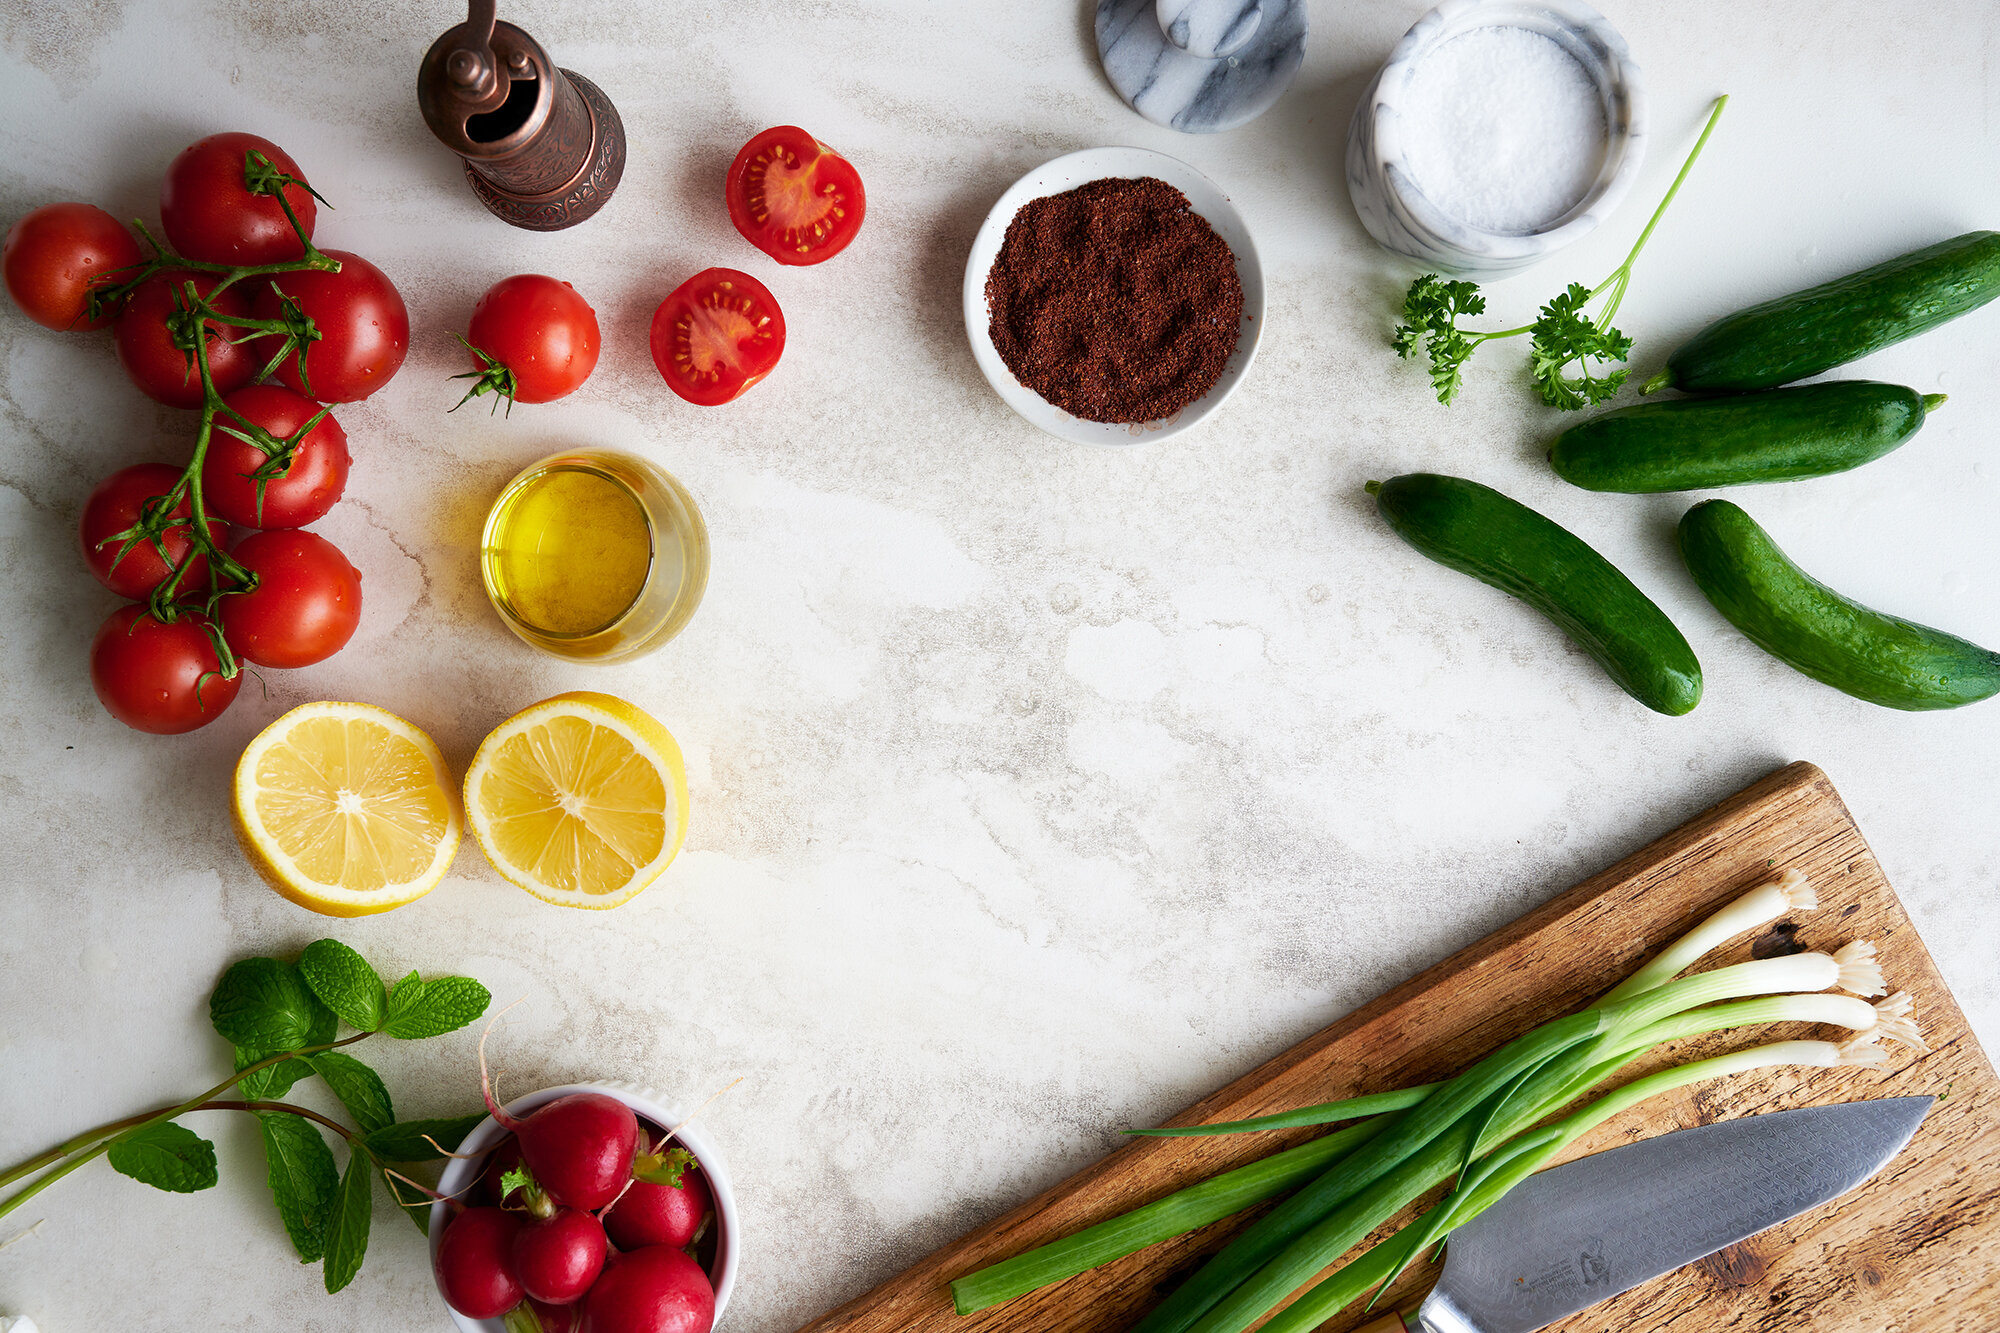
Your ingredients are your story. They’re the opening act and the headliner. No amount of gorgeous flatware or dreamboat lighting will fool anyone into wanting to take a bite out of a rotten apple. So when you go to the market, you have my permission to be shallow. Handpick the very best looking produce and perishables and inspect every single ingredient from all angles.
Tips:
Buy fresh herbs like cilantro at the very possible moment and place them in cold water to keep them bright and fresh during the photoshoot.
Buy spices that are used in the recipe. Consider getting a small amount of your spices whole (instead of ground) so you have different texture options for the photoshoot.
Prepare your produce at the very last possible second before photographing to keep them from losing color, moisture, steam, or shape.
Buy extra. You never know what might get sliced wrong, cook too long, or lose its shape or color on set. You don’t want to have to make a mid-shoot grocery run.
Lighting
Lighting can make or break your photos, especially if you’re photographing inside a studio or kitchen.
When I plan my lighting for a photoshoot, I consider the following:
The time of day people would typically eat this food
The natural lighting of the theme
The gear that’s available to me
Chilaquilles is usually eaten for breakfast, so I wanted my photoshoot to look like it was taken in bright, natural morning sunlight. That’s why I chose to use direct, hard lighting. Hard light is when you point a bright, undiffused light directly at your subject. This creates a high-contrast, pigmented image with bright whites and dark shadows. Since this is such a colorful shoot reminiscent of the southwest deserts, I thought this lighting choice would help set the mood.
If you have the luxury of bright, natural light, you can use the midday sun to get this effect. In the studio, however, this is rarely the case. I put an LED Light at a high angle on the left side of my set to create this hard lighting effect.
Camera + Gear
As I mentioned above, I positioned my LED light overhead and to the left of the set. I used my Nikon Z7 camera on a tripod to keep the shot steady. I dialed in my camera settings: ISO 160, Shutter 125, f/5.6, and SNAP! Magic.

If I can leave you with any advice, it’s this: Focus on the subject and its ingredients first and foremost. You can keep it so simple and have a gorgeous result.
All you really need is a little thoughtfulness, a great recipe, and some beautiful ingredients.
I had so much fun setting up this shoot and sharing my methods for photographing a themed photoshoot. I hope you learned something from shadowing me for a day and that you came out of it with some gorgeous new photos for your portfolio.
Oh, and if you’ve been drooling over this scrumptious plate of chilaquiles, I promise I’m not holding out on you! In my blog, Chilaquiles: Everyone’s Favorite Comfort Food, I share my detailed recipe and a bit of a history lesson on chilaquiles.
To have my monthly blogs delivered straight to your inbox, make sure to sign up for my newsletter!

Tavernas, Tarot, + Tradition : A Glimpse of Greece (+ Kofta Kabob Recipe)
You know you’re on the other side of the world when you spot the mediterranean sea. As I share my recipe for Kofta Kabobs, a little taste of Greece as I remember it, I’m retelling fun tales from my trip that stuck with me, and reminiscing about a time when the promise of authentic Mediterranean food was enough of a reason to hop on a flight and jet across the world.

You know you’ve made it to the other side of the world when you hit the Mediterranean Sea.
The moment I saw it, all I wanted to do was jump in the water. Backfloat as I gazed up at the city, draped in the crisp blues and whites I had been daydreaming about just hours ago in L.A. Even after the long flight and wrestling match with my luggage that was pathetic enough to offend the Olympic gods themselves, I couldn’t help but feel at home the moment I stepped off of the ferry.
Maybe it was the fact that blue and white are my favorite colors, or because I brought a bit of home with me (my girlfriends, Amy and Adriana) Most likely, it was the smell of garlic wafting down through the cobblestone streets. What can I say? It doesn’t take much to win me over.
It’s a funny thing when you travel, you become this other part of yourself. And when the trip is over, all that’s left is a ghost of a memory; little glimpses and anecdotes that stick with you. Now, whenever I eat Greek food, there’s a moment when my memories become a little bit clearer.

I remember Greek Suzan; I liked her. She walks 15,000+ steps a day, drinks ouzo with every meal, lives to watch the sunset over the sea, wears straw hats on the daily, and manages to get a tight 4 hours of sleep without ever feeling tired.
I think about the night my girlfriends and I went out in Mykonos after I insisted we wear heels. It was the same day my friends learned that, outside of ordering food at a restaurant, Greek Suzan should not be making executive calls. I’ll never forget the looks on their faces when I abandoned my heels after a full 8 minutes and ducked into a leather store to buy sandals.
Of course, I like to believe I more than made up for my lack of cobblestone street smarts by taking my friends on a culinary adventure through Greece. Eating our way through Crete, Santorini, Mykonos, and Athens. They let me order for the table, I pretended they had a choice in the matter ;)

We’d order mezze platters, then fill the table with a mountain of gyros, moussaka, and Mediterranean seafood. We’d eat until we could barely move. Then we’d pour our after-dinner ouzo over ice with a dash of water until it clouded white. We’d drain every licorice-y drop, then follow our noses to the next spot and do it all again.
One of my favorite memories from our trip is one that isn’t triggered by certain foods or smells but is always with me; it happened one day in Santorini. We were winding up this tight cobblestone street when we came upon an old woman on the sidewalk; a tarot reader. She had stark white hair and dark, mineral eyes, and when she looked at me, I felt her peering into my soul. She gave us a reading that day that I’ll never forget. It still sends shivers down my spine whenever I think about it. In her broken English, she revealed truths, one after another, that brought us closer together; her words bonded us for life.
When I think about Greece, I think of locals that shook their heads when I told them I was from America and mumbled, “Too much work”. I remember the lessons they taught me about the importance of family and tradition, and the way they illustrated what it means to enjoy life through the richness of simple, everyday moments. And I think about the culture that unapologetically celebrates comfort food as the truest expression of love (a country after my own heart).
So as I share this greek-inspired recipe with you, I hope you’ll take it in kind; as an expression of my love and as permission to indulge in whatever brings you joy today.

KOFTA KABOB
Recipe
I knew I wanted to write a Greek-inspired recipe blog this month, but it took me a long while to decide what I wanted to put out into the world. Although I admit that visions of gyros and falafel dance through my head on the daily, I decided to share one dish that I devoured skewer-after-skewer while I was in Mykonos, and that is Kofta Kabob.
Kofta Kabob is a simple dish made of of generously seasoned minced lamb grilled on skewers. It is wildly popular in the Middle East and can be found in many tavernas in Greece. Kofta Kabobs are filled with all of my favorite Middle Eastern spices so they instantly transport me back to the dimly lit midnight streets of Mykonos.
Kofta Kabobs are hearty, tender, smoky, and dripping with flavor; just saying their name makes my mouth water in anticipation. Often served wedged in the fold of a pita and topped with yogurt, tzatziki, cucumber and tomato salad, Kofta Kabobs are just as delicious on their own as they are when served as a full meal.
This recipe is simple, fun to make, and is sure to be a hit at your next backyard barbecue. Try it for yourself and consider it a gift from me to you; a little taste of Greece as I remember it.

INGREDIENTS
1 medium yellow onion
2 Jalapenos (remove seeds)
1 parsley bunch, stems removed
2 roma tomatoes
1 1/2 lb ground beef
2 tbsp seven spices*
2 tbsp red pepper paste (or chili hot sauce)
Salt and pepper to taste
*Seven Spices is an aromatic blend of allspice, black pepper, cinnamon, ground cloves, cumin, ground coriander, and white pepper
METHOD
To prepare, soak 10 wooden skewers in water for at least 30 minutes and lightly oil the grate on your gas grill. Then, preheat your grill to medium high. Finally, prep a tray with parchment paper and set it aside.
Chop or use a food processor to prepare the onion, jalapeño, parsley, and tomatoes. Set aside on paper towels to soak up any excess water. These veggies and herbs must be dried thoroughly to prevent over-moistening the meat mixture.
Put ground beef in a large mixing bowl and add veggies. Mix in seven spices, red pepper paste, and salt and pepper. Don’t over-work the mixture.
Pro tip: In a small pan, I cook a very small amount to test out the flavors before grilling. This gives me an opportunity to adjust my seasonings.
4. Scoop the meat mixture with your hand and mold it evenly around the wooden skewers until each one is about 1 inch thick.
5. On the parchment paper tray, lay each kabob side by side. If the meat mixture is hard to mold, set it in the freezer for 15 to 20 minutes.
6. Place the kebabs side by side on the pre heated and oiled grill. Grill the kabobs for about 4 minutes, then rotate and grill for another 4 minutes.

ASSEMBLY
While they are hot, eat them as they are or serve them up with Mediterranean favorites such as olives, grilled veggies, rice, and (of course) ouzo!
Ok now, take a bite! What do you think?!
Do you feel like you’ve been transported to the Mediterranean?
I have loved sharing these recipes and stories with you, and I would love to share more; here and on my Instagram. If you are enjoying The Recipes That Made Me series, please let me know! Shoot me a DM or like this blog :)

How to Reignite Your Passion as a Creative
I have a theory that everyone is creative. The best evidence of this comes during childhood. Remember when you didn’t have a care in the world but to make ‘magic potions’ out of leaves and dirt, spend hours building forts, and make up secret languages with your best friend? Those were the days!

Underground Poker Night With Caviar & Whiskey.
Lighting: Aputure 300D Light on right side with scrim jim diffuser. Camera Settings: Nikon Z7, ISO 100 1/30 Shutter F/7.1 70mm
I have a theory that everyone is creative.
The best evidence of this comes during childhood. Remember when you didn’t have a care in the world but to make ‘magic potions’ out of leaves and dirt, spend hours building forts, and make up secret languages with your best friend? Those were the days!
Some of us defined ourselves by our creativity and eventually built a career out of it, and others slowly moved into more structured careers. As a working creative, I count myself to be super lucky to be able to do what I love and make money; but as any working creative will tell you, things change when you start monetizing your passion.
You start getting paid to make art for other people, and then a month passes, and another month, and pretty soon it’s been a long time since you’ve made anything for yourself. You start to feel guilty. Your brain kicks into overdrive. Suddenly, you find yourself in the lost, lonely world of writer’s block, or you can’t think of a half-decent melody for the life of you, or your blank canvas haunts you in your dreams. Finally, you face the truth: You feel flat out uninspired, you wonder, have I lost it?!
I know, it’s dark.
Now, don’t get me wrong. I love photographing for other people; I get a lot out of it. But when I shoot for someone else, I’m ultimately shooting for their brand, not mine. And while it still exercises my creative muscles and challenges me to keep my technical skills sharp, it’s not the same. Any artist will tell you, it’s as much about making something good as it is about you expressing yourself and processing your human experience. And that’s not always something you can do within the confines of paid work.
If I’ve learned anything, it’s this: Just because my photography is objectively good it doesn’t mean I’m off the hook. I need to dig deeper. I need to actively look for inspiration, I need to continue to evolve as an artist, to find my voice, and then find it again.
So that’s what this blog is about; it’s about reigniting your passion as a creative. It’s not a fancy how-to blog or comprehensive list by any means, it’s just a few things I’ve been doing lately to reclaim my art, find my voice, and reignite my passion.
Do Something Else Creative
Lately, I’ve been doing paint-by-numbers to unwind. Why? Because I need new art for my house! Jk :) I do it because it’s fun and it helps me turn my brain off. And when it’s done, I feel accomplished.
Your creative brain is not rigid. Art breeds art. So get out from behind the lens and do something creative that your ego is not attached to. Exercise your creative brain by making something with your hands. Interact with textiles and materials. Get your hands dirty.
I think people are meant to be makers; it’s just downright therapeutic.
I’m convinced it’s the reason everyone started color coordinating their bookshelves and learning how to make bread (I swear, even my gluten-free friends have hopped on that grain train).
When you exercise your own creative brain with things that aren’t related to photography (or music, or architecture, or whatever your primary creative passion), your creative brain refreshes, inspires, and expands.
Surround Yourself With People Who Share Your Passion
My passion first and foremost is food, and one of my favorite things to do is to cook for my foodie friends. You know, the kind of friends who get excited over a pretty garnish and never ask for menu alterations. Those are my people! I can always count on oohs and ahhs, clean plates, and enthusiastic reviews. It makes me feel good about myself and reminds me why I love to do what I do.
If you’re a dancer - Take a friend to the ballet
If you’re a sculptor - Go to a gallery opening and mingle
If you’re a bartender - Go to an industry meetup
Observe The World
Sometimes, the best thing you can do for your art is… nothing. Really! It’s so easy to forget that there is endless inspiration around every corner. You don’t have to go looking for it, you just have to be present and open. So take a break to simply observe the world around you.
Some of my greatest inspiration has come from trying out a new restaurant in downtown L.A., going to a museum, hunkering down in a cafe to people-watch, traveling, or staring into the ocean from my boat.
Remember What You Used to Do for Fun
Do you remember that feeling of being so lost in your imagination, you didn’t even notice when it got dark. Of outright forgetting to break for lunch because you were in the middle of making something? A fort, a song, a costume, a lego structure...That ‘thing’ you used to do for fun when you were a kid is a building block of who you are as an artist today.
What did you use to do before you ever got paid?
For me, I was never a hobby photographer. But I became one because of my love for food. Growing up in Syria, food was such a big part of the culture. It was a love language of tradition, family, and connection. Since I can remember, I’ve loved making food with my hands and sharing it with other people. So it’s no surprise that I was drawn to food photography because of the food, flavors, and stories behind the pictures.
In today’s world, we’re all so obsessed with documenting. It’s a sad symptom of our generation. But the truth is…
...if you’re not documenting or monetizing something, it doesn’t mean it’s a waste of time. Take a lesson from your younger self and just do it for fun.
Take a break from social media, leave your tool at home, and go experience your passion the way you did when you were a kid.
If you’re an architect - Go stare at that building that inspired you
If you’re a musician - Lay on your bedroom floor and listen to your favorite album
If you’re a photographer - Spend an afternoon browsing the flea market
Relieving yourself of the pressure to document and create might take a few days or even weeks. We’re so conditioned to be ‘productive’, that it can feel counterintuitive to take a break. But it’s worth it. It cleans your palate and saves you from burnout.
The life of an artist is never passive; therefore, I hope this blog helps you actively reconnect with yourself as an artist and reclaim the joy of simply creating!
Part of this journey for me means learning to be vulnerable with my fellow creative community and honest about my process. Because as much as we might feel alone as creatives, many of us are going through the same things.
So with that in mind...
How do you feed your creativity? How do you keep the magic alive?
I’m pleased to say that over the last few weeks I’ve put in the work, and you know what? My photography has changed for the better. I’ve had more energy to shoot for myself. I’ve gotten really clear about the kind of content I want to put out on social media, and I’m just flat-out inspired. So although I don’t claim to be an expert on this, I can tell you firsthand that these tips really work.
I hope this blog helps you explore, expand, and evolve who you are as an artist. More than anything, I hope it helps you see your art from a new perspective to reignite your passion as a creative.
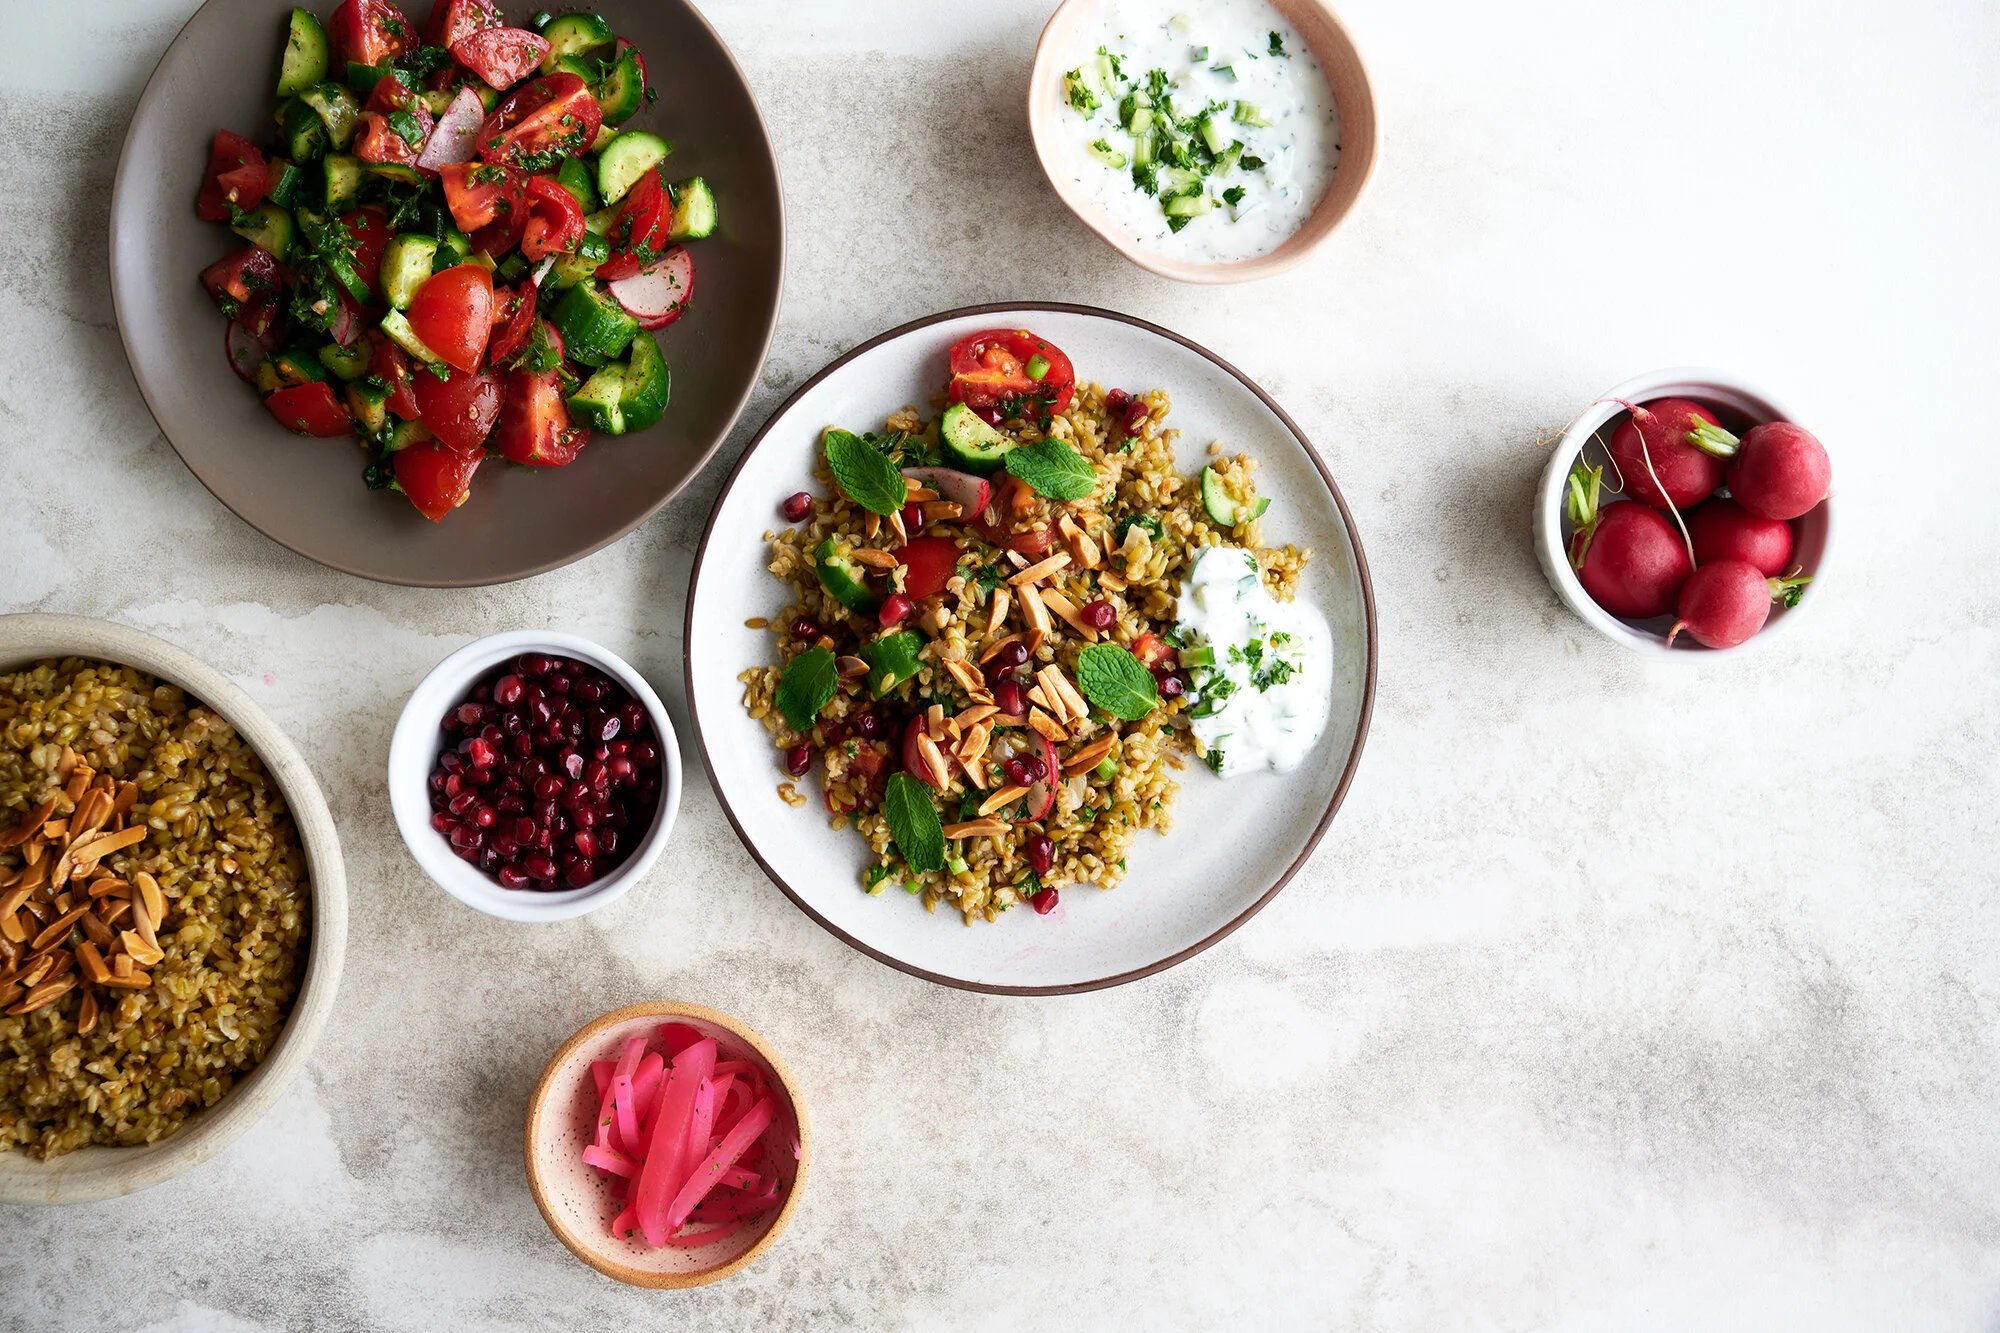
Get Your Freekeh On
Growing up, freekeh made an appearance on our dinner table more often than not; it’s a dish that hasn’t quite made its way to the U.S. but is one of my favorite dinnertime staples (and plus it’s kinda fun to say the word, freekeh). If you consider yourself to be a trendsetter, and/or a lover of beautiful food with a rich tradition, you have to try this recipe for yourself.

Growing up in Syria, the memories of home-cooked dinners with my family live rent-free in my brain.
The spark of my mother igniting our gas stove, the sound of the dull knife on the cutting board, and the smell of smoke and spices that remained in the air long after dinner (speaking of rent-free, I’m sure those smells are embedded in those walls forever). Looking back, it’s clear to me now that family dinners represented so much more than a simple meal; the food we shared was a labor of love and something that bonded us and connected us to our culture.
Isn’t it funny how memories of the most mundane moments of your childhood can damn near bring you to tears when you think about them? I’m not crying, you’re crying!
From Homs, Syria to L.A. of the U.S.A. I couldn’t be farther away from my birthplace, but the same food and flavors of my own childhood fill my kitchen. How cool is that? I occasionally have to make some ingredient modifications, of course, but I’m lucky to live in a city where I can run down to the Mediterranean market to pick up grape leaves at any godless hour of the day. Being so far from Syria, I like that my kids will grow up tasting the same foods I ate when I was their age.
Now don’t get it twisted, I’m not above the occasional frozen pizza or Trader Joe’s potstickers. I’ll just put it this way: my kids eat hummus daily; so I’d like to think that means I’m not a total failure :)
Growing up, freekeh made an appearance on our dinner table more often than not; it’s a dish that hasn’t quite made its way to the U.S. but is one of my favorite dinnertime staples (and plus it’s kinda fun to say the word, freekeh). If you consider yourself to be a trendsetter, and/or a lover of beautiful food with a rich tradition, you have to try this recipe for yourself.
The funny thing about Syrian recipes is that they’re passed down verbally from generation to generation. Nothing is written down. I still call my mom to this day to remind me of how to make something. She tells me a little bit of this, add some of that... nothing is measured, and everything is intuitive.
By tasting every layer of the dish at every stage of the process, I’ve learned to replicate my memory of what the dish tastes like so I can put it onto paper to share with all of you. So when I share these recipes, just know that they are my interpretation.
No two freekeh recipes are the same. So give this a try, and if you feel like it’s missing anything, just add a little bit of this, add some of that...
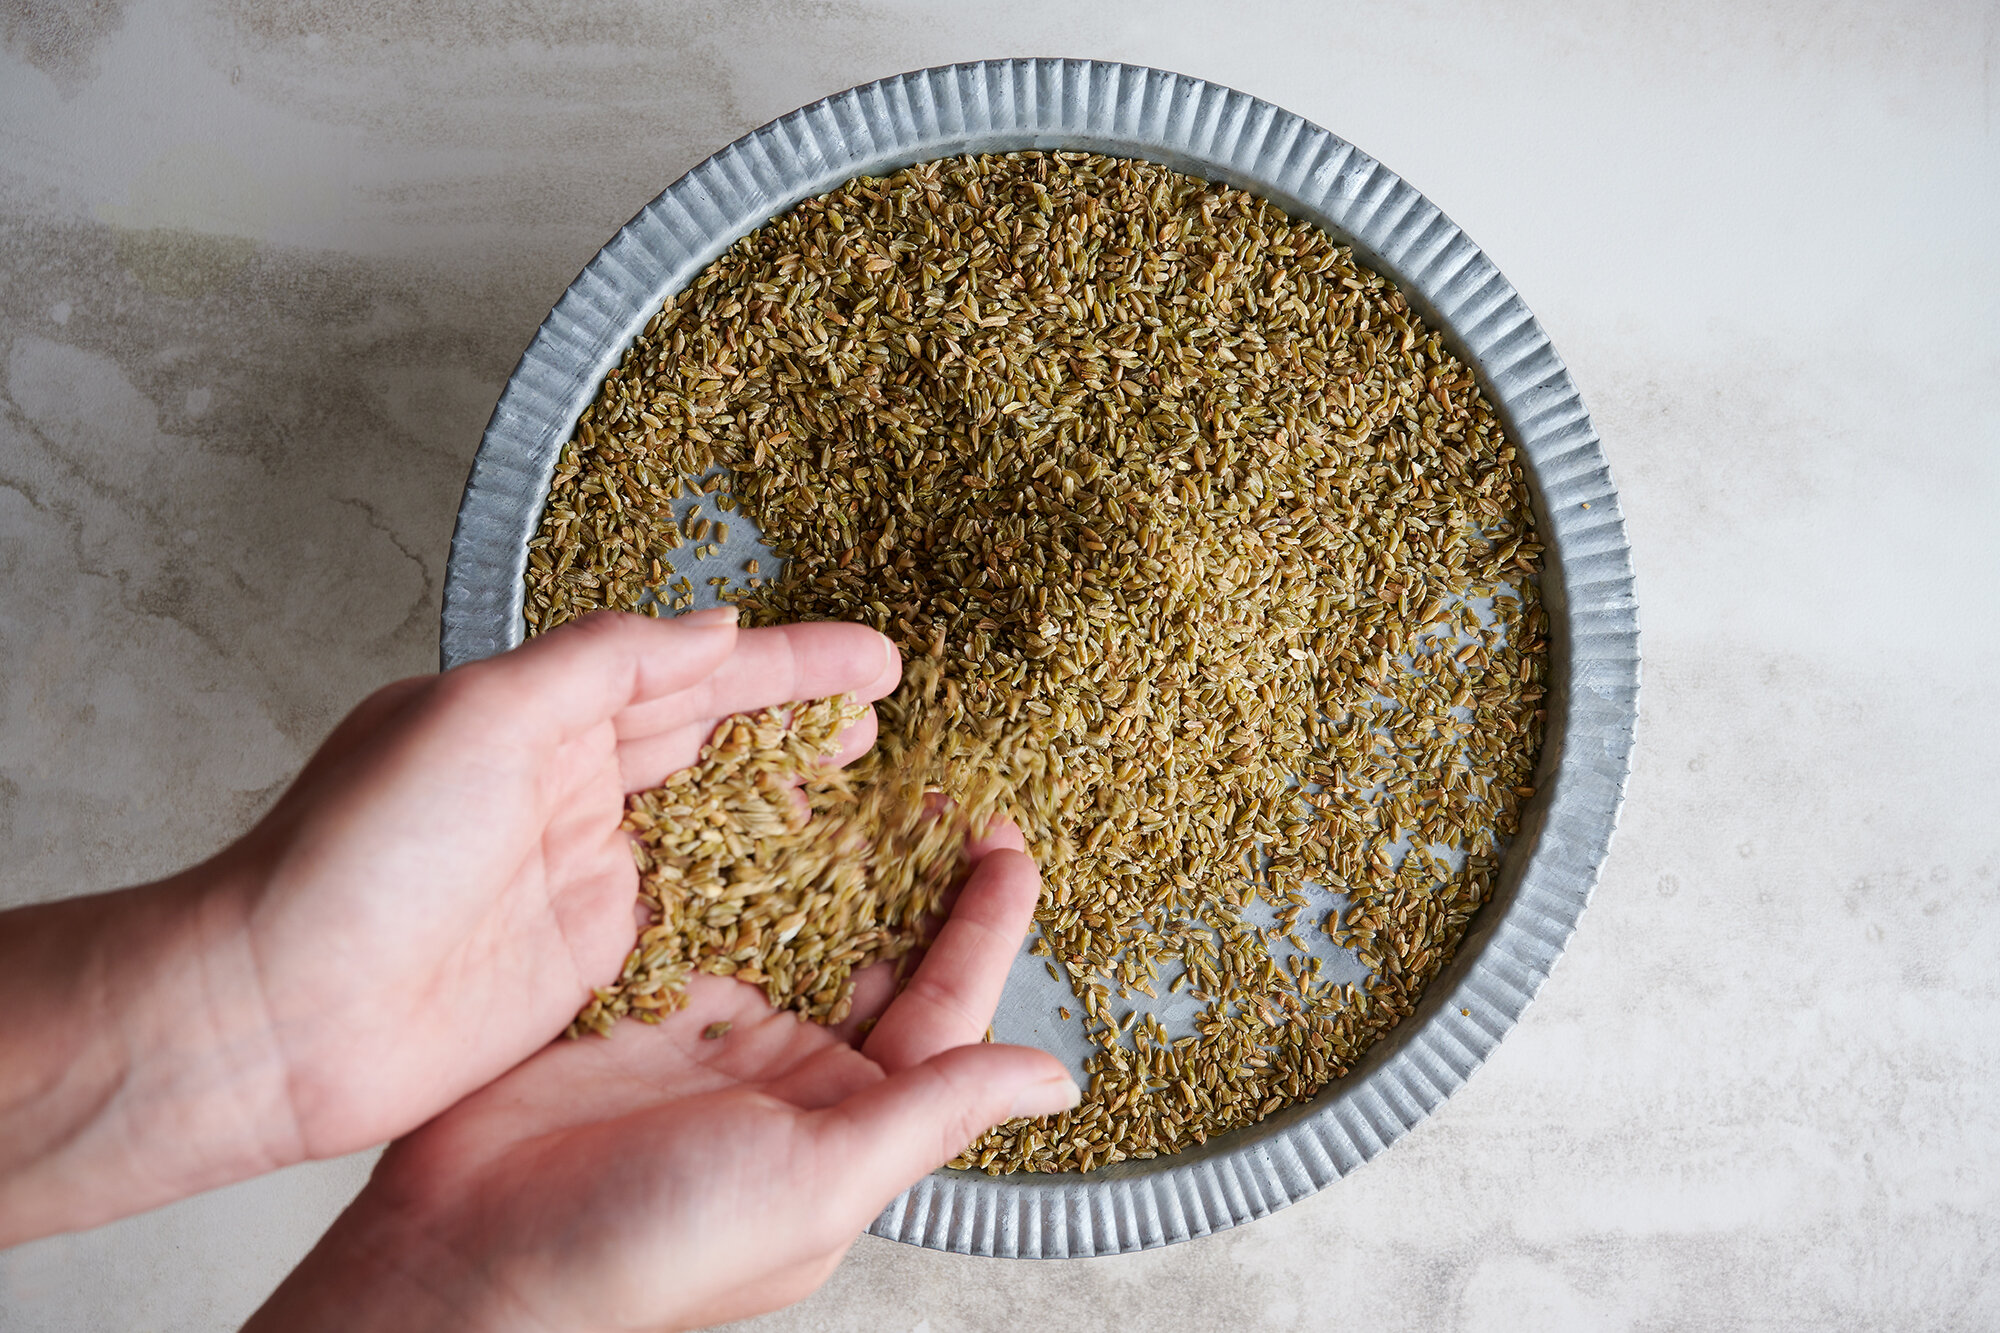
ABOUT FREEKEH
Packed full of vitamins, minerals, protein and fiber, I’m a little surprised the freekeh craze hasn’t caught on. That said, it is available in most grocery stores, so if you look for it, you’ll find it!
Freekeh is essentially wheat that is harvested early. The green grain is harvested, roasted, and shelled, leaving behind a smooth grain with a slightly nutty or earthy taste. Technically, the word freekeh describes the preparation method; but if you buy freekeh at the store, you can count on it being wheat. Freekeh can be used in place of more popular grains like quinoa, rice, oats, or farro, so there are tons of opportunities to try this recipe and use the leftovers in other dishes.
In Syria, freekeh is commonly paired with either chicken, slow roasted beef or lamb, and topped with toasted nuts. This main dish is always served with a Syrian salad and mint yogurt sauce.
Today, I’m putting a fun, vegetarian twist on this traditional dish and I’m tossing all the good stuff together into one plate! Pair with your meat of choice (if that’s your thing!) or eat it alone for an all-in-one meal. Packed with veggies, herbs, and topped with a cold, creamy yogurt sauce… oooh baby. I just can’t wait for you to try it for yourself.
Ingredients:
THE FREEKEH:
2 cups freekeh
3 tbsp ghee
1 onion finely chopped
5 cups vegetable broth
salt and pepper to taste
THE SALAD:
2 large tomatoes, chopped
4 white radishes, thinly sliced
4 persian cucumber, chopped
1 lemon, juiced
1/4 cup extra virgin olive oil
1 tbsp sumac
¼ cup mint, chopped or 2 tablespoons dried mint
¼ cup parsley, chopped
salt and pepper to taste
THE SAUCE
2 cups plain yogurt, for serving (Splurge on the good quality stuff)
2 cups cucumber, finely chopped
1 lemon, juiced
2 tbsp dried mint
½ tsp salt
Garnish*
Toasted slivered almonds and pomegranate seeds.
*optional
Method:
THE FREEKEH:
Add ghee to a nonstick pot over medium heat and add diced onion, saute and stir frequently for about 5 -8 minutes or until onions are nice and caramelized.
Add freekeh and toast until golden brown, this step is very important, it brings out the flavor of the freekeh and helps it keep its shape.
Add your broth (I like to start with hot boiled broth). Once it comes to a slow boil, lower heat, and cover. Add a pinch of salt and pepper to your liking. Cook for 30 minutes or until water is absorbed and freekeh is tender. (It’s similar to cooking rice). Set aside.

THE SALAD:
Chop your vegetables and toss them into a bowl.
In a dressing jar, add lemon juice, olive oil, sumac, mint, parsley, then salt and pepper to taste. Mix together by shaking the jar.
Pour sauce over the salad, set aside.

THE SAUCE:
In another bowl, make your mint yogurt sauce by mixing all the ingredients together.
THE ASSEMBLY:
Put a scoop of freekeh in each bowl. Top it with the salad and mix together thoroughly. Garnish with toasted almonds, pomegranate seeds, and a generous dollop of yogurt sauce.

Ok now, take a bite! What do you think?!
Thanks for getting freekeh with me!
In all seriousness, it means the world to me when you get excited about all the Syrian dishes and stories I share here and on my Instagram. If you want me to share more recipes like this, shoot me a DM or like this blog!

Preparing For A Food Photoshoot + Free Shot List Template
As a food photographer, I am hired by restaurant owners, cookbook authors, product marketers, and foodservice companies to tell their stories by artfully designing each frame to appear lifelike and delicious.

As a food photographer, I am hired by restaurant owners, cookbook authors, product marketers, and food service companies to tell their story by artfully designing each frame to appear lifelike and delicious.
Now, if someone wants to hire me to take photos of an impromptu brunch food fight: Sprinkles-in-the-air, waffles-in-your-face, banana-peels-on-the-ground, anything-goes, free-for-all, I’m game! But 99% of the time, my job is to capture intentional, high-quality product photos for a very specific purpose. And you know what helps me the most? My shot list.
In food photography, everything is intentional. From the positioning of the finished food to the ingredients and how they’re presented. The lighting, the surfaces, the textures and colors, the props... With special care for every detail, your job is to show the tantalizing details of what you’re photographing with the very little real estate to spare, and there are so many variables. That’s why it’s so important to prepare before you even pick up your camera.
In this blog, I’ll share:
What you need to do before you plan your shot list - Includes tips for vetting your clients, making a mood board, and having a successful pre-production meeting.
My FREE downloadable Food Photography Shot List Template to help you crush your next photoshoot
Pro tips to help you be prepared for anything so that your shoot goes off without a hitch.
Preparing for a Photoshoot
You can’t build the perfect shot list out of nothing. In fact, creating your shot list is one of the last things you’ll do before the photoshoot. Here are a few important things you need to do before you start working on your shot list.
Vet Your Clients (+ Get to Know Them)
The bottom line is: You want to be passionate about what you’re shooting. Sure, you’re talented, and you can shoot other styles, but photos always turn out better when they’re taken by someone who is excited about the project and who connects to the client’s brand aesthetic, story, and products. That’s just the truth.
What’s their brand aesthetic? Does their brand aesthetic align with your style and what you like to shoot? If yes, then there’s a good chance it’s a great match!
What’s their story? - Knowing where your client comes from and what drives their innovation will not only help you connect to the product, it will help you tell their visual story. And speaking from experience, asking the client questions about their ‘why’ will help make them feel more confident putting their product in your hands. It will also start a dialogue that will help you vet your clients so that you can be confident you’re working with brands that you believe in.
Do you drool over their products? Listen, I’m not saying a vegetarian can’t take great photos of bacon-wrapped turducken, but it is definitely a bonus if you look at what you’re shooting and think, I can’t wait to eat this!
Learn About What You’re Shooting
Find out what they want you to shoot. A pop-up restaurant hiring you to take photos for Instagram has very different needs than a foodservice company asking for new product shots for their catalogue.
Once you know what the client is hiring you to shoot, get to know the product(s). For example, if you’re shooting a multi-ingredient dish, get a list of all the ingredients and ask about anything else that sets this dish apart (the dish they serve it in, what they serve it with, etc). Ask about what inspired the dish and how it got its name.
Create a Mood Board
Gather inspirational ideas related to color, texture, subject, and light to create a visual mood board. I use a software program called Milatone but you can also use a free tool like Pinterest. This will help you cover every visual aspect of the photoshoot (like ingredients, props, surfaces, etc.) and will help you articulate your concept when you present it to your client.
Have a Creative Meeting
If the only times you meet your client are when you sign your contract and when you arrive at the photoshoot, you’re leaving waaaay too much space for miscommunication and overall confusion.
I always call a pre-production creative meeting to go over the project in detail, collect helpful information, answer questions, and share my mood board to ensure that we’re all on the same page. This meeting is the best time to get everything settled on both sides so that we can all show up prepared and get right to work on shoot day.
Here are a few topics I make sure to discuss at this meeting:
Style - Does the brand call for dark and moody, light and airy, etc.
Props - Build a list of unique props that will fit the mood of the photoshoot. For example, an old vintage meat tenderizer that their chef uses, a polaroid of their team, or one of their centerpieces. Make sure to talk about any supplies they might not readily have as well so that you can prepare accordingly.
Ingredients - An ingredients list is a must-have! Find out what you need and decide who is bringing the fresh ingredients (them or you).
You can learn more about these pre-production meetings in my previous blog, How to Work with a Food Photographer .
Preparing Your Shot List
I can’t even tell you how much using a shot list has helped me in my career. If you are new to food photography or are simply looking for an industry hack that will make your life a ka-billion times easier, this is it. Because when the lights are on and culinary magic is being made, even the most experienced of food photographers can forget a shot (ask me how I know).
What is a Shot List?
A shot list is your marching orders for a photoshoot. It keeps you on track, focused, and in creative flow because it takes the guesswork out of your photoshoot. With a carefully constructed shot list, you won’t have to worry about whether or not you’re forgetting anything; it’s already all on paper. All you have to do is check each shot off your list, one at a time.
Maximizing Your Photoshoot with a Shot List
When I do a photoshoot, I don’t just shoot the final product, I shoot each ingredient separately and at different stages of preparation to tell the story of the dish. A shot list helps me maximize a photoshoot by identifying photo opportunities from start to finish.
For example, if I shoot a Pomegranate Berry Smoothie, I take photos of me cutting the pomegranate and washing the berries and seeds under the sink. I take action shots of me filling the blender, etc. until I take my final, crowd-pleasing hero shot. I do this because I want the client to have plenty of options to choose from, some traditional, and some not-so-traditional. It’s a way for me to maximize my photoshoot for a big variety of images (even if they didn’t ask for them).
The three main shots I make sure to get for each dish are:
An ingredient shot - Alone and together in various groupings.
A human shot - Typically these are hand shots showing the preparation process.
A final shot - This is called the ‘hero’ shot.
Note: My shot list process for videos is not all that different, but it is a bit more detailed. When I do a videography shoot, I write out each clip that I’ll be shooting beforehand and also describe each transition between shots.
Don’t have your own shot list? Use mine! Click to download your free copy!

Pro Tips for a Seamless Food Photography Shoot
Funny story, a few weeks ago, I was shooting a video for a product and I was testing out a new hand slicer. Surprise, surprise, I cut my hand. And because of special covid precautions that required me to restrict the number of people at the shoot, I was not only the food photographer that day, I was also the designated hand model... bleeding all over the place. And yes, I realize the absurdity of the fact that I got in a hand modeling accident 😂 but my point is, even at a food photoshoot, you never know what’s going to happen.
As a self-taught food photographer, I’ve learned a lot through trial and error. I could write a whole entire blog about some of these lessons, but today, I’ll simply leave you with a few final pro tips to help you have a seamless and enjoyable food photography shoot.
Come prepared - Make a list of the props and gear you’ll need for the photoshoot and pack it all up ahead of time. Plan your travel so that you’re not rushing to location. Find out if the client wants natural lighting or artificial lighting and make sure you know what kind of available natural light you’ll have for your shoot so you can pack accordingly.
Define a point person - Something always comes up on photo shoot day that you did not anticipate. It’s just the way it goes. Make sure you have a point person on site who can answer any questions that might arise, and who has the authority to make executive decisions if needed.
Have an extra hand on set - Remember that hand modeling story from before? Thankfully, I had an extra hand on set (literally) - My assistant! She was able to jump in and take over. And that day, *dramatic pause* a (hand) model was born.
Bring back ups - Bring extra batteries, SD cards, a tripod, an extension cord, a phone cord, different types of lenses, lights, a reflector, etc.
There you have it! If you follow these pro tips and create a shot list, you can rest assured you’ll make the very most of your photoshoot and be ready for whatever the day throws at you.
Never miss a shot again! Use this downloadable template to make creating a shot list an easy part of your pre-production planning.

How to Work with a Food Photographer
You are a restaurant owner, a magazine editor, a cookbook author, a product marketer, or a food service company. You take great care in creating signature dishes, visual spreads, and food products, and signature dishes. Your story and your product set you apart.

You are a restaurant owner, a magazine editor, a cookbook author, a product marketer, or a food service company. You take great care in creating signature dishes, visual spreads, and food products, and signature dishes. Your story and your product set you apart.
But nowadays, It takes more than a delicious product to be successful. You have to get it in front of the right people, and that’s where I come in.
In today’s world of social media, digital marketing, blogging, foodservice apps, and self-publishing, beautiful images that are professional, visually appealing, and on brand, are more important than they’ve ever been. Great images communicate company expertise, confidence, and commitment to quality. They are a first impression, and a lasting impression of your business, and an eat-with-your-eyes experience that helps attract your ideal client - the kind of people that will always come back for second helpings.
What do Food Photographers Do?
In a breath: Food photographers create craveable content. We are artists whose primary goal is to make your food appear so lifelike and delicious that you’re tempted to reach into the picture and take a bite. Food photographers want to tell your story, and we do so by artfully designing each frame using these elements:
Food styling
Lighting
Brand voice
Framing
Props
Editing
Motion*
An experienced food photographer knows how to show off the textures, colors, and ingredients of your dishes and communicate who you are as a brand by perfectly orchestrating these variables.
Why You Should Hire a Food Photographer?
Supplement Your Marketing
Whether you have an internal marketing team or not, quality food photography is worth investing in. Pictures are often the first impression people have of your business; whether they land on your website or scroll through your social media. Do your images demand attention? Do your images do your product justice (i.e. does your food look as good as it tastes?) High-end food photography is a way for potential customers to ‘taste test’ from their home. To see their meal before they order it. Great food photographers create images that enhance your marketing efforts, elicit an emotional response, and (frankly) make your target audience drool.
Showcase Your Brand
What are you selling?
Who are you?
Why does your product matter?
Consumers today want to feel connected to the brands they support. For some, it’s as much about what as it is about the who and the why. With so many products on the market, each of them clamoring for attention, high-end food photography sets you apart. It commands attention and helps you tell your story without saying a single word.
Attract Your Target Aaudience
An establishment that describes themselves as “a quirky dive bar chain with curiosity-shop decor” and another that claims to be “a high-end whiskey bar for the urban gentleman” both offer alcohol and yet appeal to very different demographics.
Food photography uses photography elements like lighting, food styling, angles, framing, colors, and props, etc. to tell people who you are. This attracts like-minded people to your business or product and increases the odds of earning life-long customers that will come back.
Elevate Your Product Value
Professional, high-quality photos tell your customers that you have invested in your product and you believe that it’s worthy of beautiful photos. They prove that you value quality and elevate your product and brand as a whole.
How to Find The Right Food Photographer?

Decide What You Want
Take inventory of your photography needs. Comb through your online and print media and make a list of the parts that are in need of high-quality food photography (and videography)
Instagram: Feed, story, reel, and IGTV
Website images: Pay special attention to your homepage
Marketing collateral: Brochures, product sheets, menus
Prints: For your shop
Then, take note of your future needs
Pictures for your cookbook
New products or menu items
Finally, arrange them in order of priority - based on the needs that will make the biggest impact on your business - and set a budget.

Do Your Research
Look for photography on Instagram, LinkedIn, websites, cookbooks, print media, etc., and start collecting images that really resonate with you and have a similar aesthetic to your brand. Pinterest is a great place to find and collect examples of work, or a simple Google Doc will also do just fine.
Based on these, create a list of food photographers and reach out for availability and quotes.
Hire a Food Photographer for Their Style & Capabilities
It is so very important to hire your food photographer for who they are as an artist. You want the work to feel natural and exciting to your food photographer. Although many of us are able to shoot in different styles, I can guarantee that some are already naturally shooting in your brand style. Those food photographers may be able to offer additional expertise, creative ideas, and a collection of additional props and equipment to help your vision come to life. Plus, they’ll approach the project with the magic that comes from working in their natural creative flow.
On this topic, make sure to vet your food photographer for their professional skill level and access to the equipment your project requires. For example, if you need product shots for your website, you may need access to someone with a studio and studio lights. If you want a food photographer that also does videography (like me!) that is a special skill set that will narrow down your search.
Ask About Rates Up Front
If you have budgetary concerns or limitations, be upfront about what you can pay for a certain project and ask what they can provide for you within that budget (this is the main reason I recommended listing your food photography needs in order of priority). Your food photographer should be able to provide you with an estimate after learning more about your photography needs and priorities.
Meet Your Photographer
It’s important to jive with your food photographer! You want to feel comfortable giving feedback and asking for what you want, and they want to feel comfortable working potentially long hours with you and your team. There should be a general sense of trust and respect.
Here are a few key factors to pay attention to when you meet them. Your food photographer should:
Be a good listener and communicator.
Be excited about the project. Not just about ‘closing the deal’.
Have experience with food photography. Lifestyle, wedding, or landscape photography is very different.
Have examples of work that is similar to your vision.
Come prepared with some ideas. It should be clear they’ve done their homework.
Appear confident and humble enough to take feedback.

Request an Estimate and Sign a Contract
This is a great time to confirm your vision with your food photographer and agree on clear deliverables. It’s also important to ask important questions, such as:
How often will you meet?
When is the shoot?
Who will be involved?
What are the start date and the project timeline?
How many images will you deliver?
What is the final budget?
Once you’ve worked out the details and signed the contract, it’s time to get to work!
How to Work with a Food Photographer
You’ve found a photographer you like that has a style you resonate with and provides the services you need. Now, it’s time to build a positive, long-lasting relationship with them. All of the advice I give you below will make you an easy person to work with, which will make your food photographer more likely to have a positive experience and want to work with you in the future.
I can say from experience that working creatives is one of the things I love most about my job, so there is so much potential for a long and lovely working relationship!
Make Introductions and Assign a Point Person
Introduce your food photographer to the creative team and anyone they’ll be directly working with. Assign a point person for the job (and stick to it). Make sure you are communicating internally so that the photographer only has to communicate with one person via email.
You know what they say about ‘too many cooks in the kitchen…
Have a Pre-Production Meeting
While every food photographer is different, I always call a pre-production meeting to go over the project in detail. In this meeting, I collect all the information I need to get started designing the shoot. We talk in detail about the product and decide what colors, lights, props, hand models (oo-la-la), and ingredients we need.
This is a great time to share brand guidelines or a mood board if you have one. If you are letting your food photographer decide on the creative direction of the photoshoot, make sure their mood board gets approved before the shoot day.
Think about the pre-production meeting as the best time to get all the final questions answered on both sides so that everyone can show up prepared and get right to work on shoot day.
Make Yourself Available
Communication is so key. You have to remember that your food photographer is a contract employee who doesn’t have years of insight into your specific business. So, on shoot day, there may be last-minute questions that come up - it’s so important that the point person is available to answer any questions promptly to keep everything running smoothly and avoid delays. If you or the pre-established point person can’t manage the project in a timely fashion, consider giving decision-making privileges to someone else in your company.
I’ll wrap this up with two final requests:
Treat them like a partner: They’re your partner, not an employee, so communicate with them, cheers them, laugh with them, and engage in radical honesty. Mutual respect and honesty are key if you want to get their very best work and grow as a team!
Pay it Forward: This is not at all a must, but I am a firm believer in paying it forward. Nothing makes me feel better than dumping love and appreciation on a deserving recipient! It’s an instant dopamine rush not unlike the feeling of biting into a warm bismark donut. If you love their work, leave them a review, write a post on Instagram about your experience with them, recommend them to your friends, etc.
Are We a Good Fit?
If you are on the market for a food photographer, we may be a match made in culinary heaven! I get excited about working with food companies that are passionate about their product and that have a story, big or small. I love shooting stills, and love bringing food to life through videography and food motion. My style is approachable, friendly, and simple. I love editorial food photography and would love to shoot for a magazine one day or a cookbook. In fact, I’ve flirted with the idea for years of writing one myself - perhaps just to check that off my wish list :)

I believe food photography is one of the single most important things you can do for your business. And I also know that the ‘unknowns’ of working with a food photographer can be a big barrier for companies who could benefit so much from beautiful pictures. So I hope that this blog answered your questions and gave you the final nudge you needed.
High quality, show-stopping photos are yours for the taking, so get the visual content you need to finally bring your beautiful products into the spotlight by hiring a food photographer.
Am I the food photographer of your dreams? Contact me to find out!

Staying Connected in 2020: Why I’ve Made Family Dinners a Tradition
When I was young, I remember family dinners vividly. All of our family gatherings were structured around food. My mom would invite her friends over, light up charcoal grills, and sit around the table rolling grape leaves, building a Syrian feast from scratch. Falafel, hummus, baked pasta, stuffed grape leaves, tabouli, kabobs. Putting love and life into each ingredient while she laughed and smoked cigarettes, always making more than enough for all the families.

When I was young, I remember family dinners vividly. All of our family gatherings were structured around food. My mom would invite her friends over, light up charcoal grills, and sit around the table rolling grape leaves, building a Syrian feast from scratch. Falafel, hummus, baked pasta, stuffed grape leaves, tabouli, kabobs. Putting love and life into each ingredient while she laughed and smoked cigarettes, always making more than enough for all the families.
These experiences are what instilled in me a reverence for the process of food preparation and enjoyment of a good home cooked meal. These memories have stayed with me for a lifetime, and perhaps you can relate.
Whether or not you enjoyed a Syrian feast or microwave dinners, there’s something really special about ending the day around a big table eating dinner as a family.
But the sad truth is, regardless of how much you might love the idea of family meals, the reality of trying to schedule around homework, sports, social life, and the remnant ingredients in your fridge is reason enough to feel discouraged and give up before you even get started.
For better or for worse, quarantine took routine and flipped it on its head. And while this is nothing to celebrate on its own, it has made having family dinners so much more possible, and (dare I say) more important than ever.
In this blog, I’ll talk about why I believe family dinners are so important. I hope you’ll follow along and feel inspired to make family dinners a tradition that keeps your family connected during quarantine (and beyond).


I can still remember the commotion. The chatter around an open grill, the bellowing laughter, the sound of knives thumping on our worn wooden cutting boards. The sound of tiny feet stampeding through the kitchen. And when I really focus, I can still hear the voices of my siblings and me whining for Taco Bell and McDonalds. We were truly pathetic. It was so messed up on so many levels. But the memory still makes me smile as I realize that even our lack of gratitude couldn’t keep my mom from giving us a labor-intensive, beautiful meal, and memories I will cherish for a lifetime.
I remember the good, the bad, and the ugly every time life gets in the way and family dinners get pushed aside. Thankfully, quarantine has reestablished this value in my home. In the last 3 months, we’ve eaten together a lot more. Family dinners have become an intentional experience; we make things from scratch, explore cuisines, bust out cookware that’s been collecting dust (like our beloved wok). We’ve even made a weekly tradition of Sunday Night Homemade Pizza.
Even when I’m met with resistance, I know that I’m giving my kids lasting memories that they’ll look back on fondly.

With social media, Netflix on demand, and a billion unnamed distractions at your fingertips, the art of conversation is easily set to the wayside. But in the wake of a global pandemic and this powerful resurgence of the Black Lives Matter movement, having real conversations with your loved ones is more important than ever.
Life is hard right now, people feel alone, confused, and discouraged. It’s so important to me to not let what’s happening in the world carve space in my home. Family dinners have helped my family reflect, grieve, and connect on a deeper level. This kind of openness doesn’t just happen, it takes a concerted effort to hold space for one another and build family conversations into your daily routine. The tradition of family dinners has paved the way for conversation, and has allowed me to be there for my kids as they process the weight of the world and all the messages they’re hearing.
If you’re struggling to know how to get tough dinnertime conversations started, here are a few tips:

Be Present
I have teenagers so I’m no stranger to cell phones around the table. During family dinners, I have a rule that phones can be nearby, but they have to be put on silent. It’s polite, it’s realistic, and it works for us. 23 hours of the day can be spent communicating with other people, I don’t think it’s too much to ask to set aside 1 hour to chat with the family.

Create a Safe Space
Make it known that you value honesty above all else, and you are all there to learn from one another. Make it clear they can feel something today and another thing tomorrow and that’s ok. What’s most important is that they’re staying humble and learning.
Don’t be afraid to dive into tough topics. Here are a few prompts to help you talk about racism and COVID-19:
“What do you think about what’s happening with the Black Lives Matter movement?”
“You weren’t able to end the school year with your friends - Let’s talk about it. I can imagine that’s disappointing.”
“Is there anything you’re confused or scared about?”
“Why do you think other people feel that way?”
“Help me understand why you feel that way”
“What’s something new you’ve learned this week?”
“What’s something you’re sad about right now?”
“What’s something you’re grateful for right now?”
Some other great ways to prompt conversations about race are to:
Watch a movie together with black leads and talk about it over dinner.
Buy age-appropriate books by black authors for each kid and ask them to take turns telling the family about their book over dinner. (Note: Buy from black owned bookstores - here’s a short list.)

Make an Action Plan
It’s easy to feel helpless or confused during this time. I’ve seen a lot of posts akin to, “you’re damned if you do, damned if you don’t, so what’s the point?” but I don’t believe giving up is the answer. There’s always something you can do to be the change you wish to see. Encourage your family to get out from behind their computer screens and come up with ways to take action.
Ask open ended questions like:
“What is one action we can take this week to help the people who need us most?”
“What would make you feel excited about this summer, even though we’re in quarantine?”
I’m no family psychologist, but I do believe the best way to stay connected and foster a learning environment in your home is to keep the line of communication open and encourage potentially uncomfortable conversations.

“Tough conversations are always made a little better if you can have them over a beautiful dinner, I stand by that.”

Perhaps my favorite part of family dinners is the collaborative effort that goes into making dinner. Don’t get me wrong, some days I’m entirely on my own, but even then, I have one rule that makes even those nights a collaborative effort:
The chef never cleans up.
Let’s be real, cleaning a fork is a small price to pay for a mind-blowing, mouth-watering, 3 michelin star, once-in-a-lifetime meal ( ...if I do say so myself 🙂)
I have a lot of fun making family dinners into a true event. Meals were such a rich experience for me growing up, that I want my kids to have a similar connection to food. Before I start cooking, I’ll bounce a few ideas around and give them a chance to weigh in. Oftentimes, I’ll have something in mind based on what I found at the store, or I’ll make a game out of building a meal out of random things in my fridge when they complain that we’re out of food.
Voila! TACO PASTA! Eat your heart out, kid!
When the table is set and the food is out on the table in all its glory, I take a little time to explain the dish as I would if I were a chef in a fancy restaurant. Describing the steps and all the attention that went into making the meal helps them feel connected to it. Finally, I remind them to ‘eat with your eyes, your mind, then your mouth’, and the rest is history.
I’m proud to say my kids really appreciate food, and I’d like to think my pre-meal ritual has a little something to do with it.
Oh and before you jump to conclusions, we do order takeout sometimes (I’m only human, after all) and that’s always a collaborative effort, for better or worse… (Okay, who am I kidding - it’s the actual worst - no one can EVER agree).
All this to say, family dinner is my JAM. It’s one simple ritual that’s kept us connected and communicating throughout the craziest year of our lives. As much as I’m a die-hard believer in family dinners, there are other ways to weave family time into your daily life. If you’ve made it this far and you’re not convinced family dinners are for you, maybe family game nights or weekly family hikes are more your speed.
Whatever works for you, pair it with good food and good conversation and you have my full support.
5 Ways Small Business Owners Can Grow During a Pandemic
Whether you’re the owner of a french-inspired cafe or hometown diner, or the founder of an upscale boutique or custom paper shop, COVID-19 has affected each and every one of us. As an entrepreneur myself who works primarily with small businesses, I realize the life-altering impact of shuttering your doors.

Whether you’re the owner of a french-inspired cafe or hometown diner, or the founder of an upscale boutique or custom paper shop, COVID-19 has affected each and every one of us. As an entrepreneur myself who works primarily with small businesses, I realize the life-altering impact of shuttering your doors. Even as some states are beginning to reopen, we are still so far from ‘business as usual’.
While income and revenue are a huge consideration, there’s also the discomfort of just not knowing what you can do during this time to move your business and your life forward; the feeling of having lost momentum.
Now, before I get started, I want to make it clear: This is not another ‘silver linings’ blog. I am not here to guilt you into being more productive (I swear, those memes drive me to day drink). If you’re currently wearing your son’s PJs, putting lipstick on your dog, and binge-watching Tiger King, you will get NO judgment from me. This blog is simply a resource for those of you who are ready to focus on what you can control during this time.
Let’s dive in! Read on for 5 ways you can grow your business (and yourself) during COVID-19.

ASSESS YOUR BRAND + BUSINESS PLAN
Perhaps what I admire most about small business owners is their incessant hustle. Do you remember what it was like to get your business off the ground the first time? You started with a dream and marinated in all its possibilities. Then, you considered the current economy and thought deeply about how you could (and would) fill the void. You figured out what would make you different, memorable, and set you apart. You started with an idea, and carved it into something real and tangible.
You did it once, now it’s time to do it again.
Start by thinking about your brand - What do you offer that makes you memorable? Then, consider those as you brainstorm quarantine-friendly, on-brand ways to pivot.
Are you quirky? Host a bidding war for the naming privileges of items on your quarantine takeout menu. “For $100 we’ll name the sloppy joe after your ex - boyfriend.” Or give away a free roll of toilet paper with every order, the options are limitless!
Are you philanthropic? Donate a meal for every meal purchased to the local hospital or offer a discount for people in the industry that have been affected.
Are you upscale? Offer cocktail kits from your bar or limited batches of your iconic dessert for pick-up; or, be a trailblazer and launch a new genre of high-end takeout.
Are you casual? Compile quaint, pre-made picnic baskets for a fun, day date option.
Don’t be afraid to think waaay outside the box. These are unprecedented times and anything goes.
Are you having trouble coming up with ideas? Do your research about what others are doing in your industry. Reach out to local businesses that are doing well and ask them for advice or brainstorm ways to partner with them. It might sound counter-intuitive, but now is the time to set aside competitive egos to help one another out.
The success of one small business raises the industry as a whole.

CONNECT WITH YOUR CUSTOMERS
Just because your open sign is turned off, or you’re open for fewer hours, it doesn’t mean you can’t still be with your customers.
Many restaurants have started hosting virtual happy hours, encouraging attendees to ‘tip their bartender’ on PayPal or Venmo. Others have streamed virtual cooking or bartending classes, allowing chefs and bartenders to use the vacant restaurant as a studio.
If you own a retail business like a clothing boutique, ask your employees to do Instagram LIVE takeovers. Take this time to create your style-guides for summer, or host a virtual meetup and interview a wardrobe stylist.
Finding creative ways to help your employees and connect with your customers right now is imperative to the long-term success of your business. The more visible you can be during this time, the better.
A few additional tips:
Be transparent about cleaning procedures. It’s all about building trust. Your customers are concerned for their safety - Tell them about everything you’re doing to keep them safe.
Remind them what you offer. Do you have a special takeout menu? Meal kits to-go? Are you selling groceries now too? Encourage customers to order from your menu, snag their enchilada meal kit before inventory runs out, or buy their milk, eggs, avocados, and toilet paper (always toilet paper) from you. Announce what you offer clearly and often.
Tell them how they can support you. Your local patrons want to support you during this time. It’s up to you to tell them exactly how to do that.
Get creative when beginning to open your business back up. Beginning to open your doors doesn’t have to look like it did before COVID-19. You may be dealing with the challenge of having fewer employees or may simply be uncomfortable opening your doors all the way just yet. If you’re a restaurant, consider offering reservation-only dining so you can limit capacity to ensure careful distancing and extensive cleaning procedures. If you’re a boutique, consider offering appointment-only shopping experiences - make them special by offering a fun beverage and/or personal styling assistance.

As you go through all your online platforms, pay close attention to your images.

CREATE (AND AUDIT) CONTENT
This is a great time to think deeply about your content; I recommend starting with a content audit. Comb through your online presence and make a list of anything that has slipped between the cracks.
Take note:
From your website to social media to yelp page, etc. - Is your brand consistent?
Is your website modern and up-to-date or does it need a refresh?
Have you made an online store for your merch?
When was the last time you sent out a newsletter?
When was the last time you posted a blog?
When was the last time you posted on social media?
Take stock of your online brand and think about any gaps in content or areas that need to be polished up. The great news is that many of these tasks require nothing more than a little time and elbow grease (if you’re reading this, my guess is, you have both).
As you go through all your online platforms, pay close attention to your images. The impact of professional on-brand images is huge. Your photos either support your branding or distract from it entirely.
Here are some considerations:
Are the images on-brand?
Are the mood, color palette, and style consistent?
Are the images unique and interesting?
Do the images tell a story?
If you have stock images on your website or are still using an iPhone 4 to take social media images, I highly recommend taking this opportunity to clean up your content; whether that means spending dedicated time archiving photos that aren’t on brand, snapping fresh content, or (even better) hiring a professional to develop a library of on-brand images that will make your social media and website come alive.
If you are interested in working with a professional photographer, contact me to learn more about my social-distancing-approved options!

SET DAILY GOALS
To be clear, this is not about productivity. This is about digging deep and recognizing that you have a say in how this goes. It’s about deciding where you want to focus your energy to get exactly what you want out of this time.
Some of you are fired up to rewrite your business plan, bake a hundred loaves of bread, and learn a new language. But for many of you, learning to slow down, take a nap in the middle of the day, and not be productive is the personal ‘win’ you really need.
The important part isn’t to ‘be productive’, it's to set achievable goals every day that will help keep you stay grounded and grow in the ways you need the most.

STAY CALM & TAKE CARE OF YOURSELF
Isolation, interruption to routine, and lack of daily structure can really affect your mental health. If you’ve suddenly found yourself without a job, it’s so important that you stay vigilant to defend against the physical and psychological toll that this can take on your health.
While I’ve given you a number of ways to grow yourself and your business during this time, I want to remind you to keep everything in perspective and remember that your number one goal right now is to stay healthy.
Get plenty of rest, eat healthy food, drink water, take your vitamins. Block out time for a virtual yoga class or a long walk in the sunshine, start a journal, reach out to family or friends often, and especially when you’re feeling overwhelmed. Allow yourself to feel whatever you’re feeling and know that you are doing everything right.
The best way to keep your immunity high is to keep calm and take care of yourself; body, mind, and spirit.
So there you have it, my 5 tips for growing during a pandemic. Clearly, this list is not exhaustive; in fact, one of the most incredible lessons in this is realizing that nothing is promised and everything is possible. My hope for you is that you’ll take this time to think deeply about your business and make the choice to take an active role in how this plays out.
Above all else, I hope that you’ll be patient and compassionate with yourself, lift up small business owners in your community, and stay open to any new opportunities that may arise during this strange time.
Over the next few months, I’ll be sharing helpful resources (like this one) for restaurant owners, small business owners, and foodies of all flavors! Upcoming topics include a free mood board and branding ebook you won’t want to miss. If you haven’t yet, sign up for my newsletter to get all of it sent straight to your inbox.